
In this tutorial, we are going to see How to Install NextCloud On Ubuntu 22.04 LTS. This will be a detailed setup, we have provided steps to increase the performance of Nextcloud and apply all the security measures needed to secure the server.
Nextcloud is a file hosting system that allows us to store our content like documents, pictures, videos, etc, and share it with others.
Instead of relying on external service providers for our personal and business documents, Nextcloud gives us the freedom to store them on our servers or in trusted data centers. it’s a self-managed centralized document and file management system.
Below we provided a detailed step-by-step guidelines on how to install Nextcloud on Ubuntu 22.04 LTS. To maintain high performance and security, we have added necessary steps to add more features on the system. Each steps are highly recommended to setup a production grade Nextcloud environment.
- Step1: Install Required Packages
- Step2. Configure MySQL Server
- Step3. Download, Extract, and Apply Permissions.
- Step4. Install NextCloud From the Command Line
- Step5. Install and Configure PHP-FPM with Apache
- Step6. Create info.php Page for PHP feature check
- Step7. Enable Opcache in php
- Step8. Enable APCu in php
- Step9. Install and Configure Redis
- Step10. Install SSL and Enable HTTP2
- Step11. Pretty URL's
Step1: Install Required Packages
1. Update and Upgrade the Ubuntu Packages
apt update -y && apt upgrade -y2. install Apache and MySQL Server
apt install apache2 mariadb-server3. Install PHP and other Dependencies and Restart Apache
apt install libapache2-mod-php php-bz2 php-gd php-mysql php-curl php-zip \
php-mbstring php-imagick php-ctype php-curl php-dom php-json php-posix \
php-bcmath php-xml php-intl php-gmp zip unzip wget
4. Enable required Apache modules and restart Apache:
a2enmod rewrite dir mime env headers
systemctl restart apache2
Step2. Configure MySQL Server
1. Login to MySQL Prompt, Just type
mysql2. Create MySQL Database and User for Nextcloud and Provide Permissions.
CREATE USER 'nextcloud'@'localhost' IDENTIFIED BY 'passw@rd';
CREATE DATABASE IF NOT EXISTS nextcloud CHARACTER SET utf8mb4 COLLATE utf8mb4_general_ci;
GRANT ALL PRIVILEGES ON nextcloud.* TO 'nextcloud'@'localhost';
FLUSH PRIVILEGES;
quit;
Step3. Download, Extract, and Apply Permissions.
Now download the latest Nextcloud archive file, Go to the Nextcloud Download Page. Or you can download from direct link: https://download.nextcloud.com/server/releases/latest.zip
1. Download and unzip in the /var/www folder
cd /var/www/
wget https://download.nextcloud.com/server/releases/latest.zip
unzip latest.zip
2. Remove the zip file, which is not necessary now.
rm -rf latest.zip3. Change the ownership of the nextcloud content directory to the HTTP user.
chown -R www-data:www-data /var/www/nextcloud/Step4. Install NextCloud From the Command Line
We are going to install Nextcloud on Ubuntu 22.04 from the command line, it will save us time as we are providing all the database and admin credentials for installation. It will install Nextcloud silently, we don’t have to go through web setup. For detailed Nextcloud Command line installation, visit this page.
1. Run the CLI Command
cd /var/www/nextcloud
sudo -u www-data php occ  maintenance:install --database \
"mysql" --database-name "nextcloud"  --database-user "nextcloud" --database-pass \
"passw@rd" --admin-user "admin" --admin-pass "admin123"
If everything goes well the command will output “Nextcloud was successfully installed”. We provided a very simple user/password, during production setup, this must be a complex password.
2. nextcloud allows access only from localhost, it could through error “Access through untrusted domain”. we need to allow accessing nextcloud by using ip or domain name.
vi /var/www/nextcloud/config/config.php

  'trusted_domains' =>
  array (
    0 => 'localhost',
    1 => 'nc.mailserverguru.com',   // we Included the Sub Domain
  ),
  .....
:x    // saving the file
3. Configure Apache to load Nextcloud from the /var/www/nextcloud folder.
vi /etc/apache2/sites-enabled/000-default.conf

<VirtualHost *:80>
        ServerAdmin webmaster@localhost
        DocumentRoot /var/www/nextcloud
        ErrorLog ${APACHE_LOG_DIR}/error.log
        CustomLog ${APACHE_LOG_DIR}/access.log combined
</VirtualHost>

:x- Now, Restart Apache Server
systemctl restart apache2Now, Go to the Browser and type http:// [ ip or fqdn ] of the server, The below Nextcloud login page will appear.
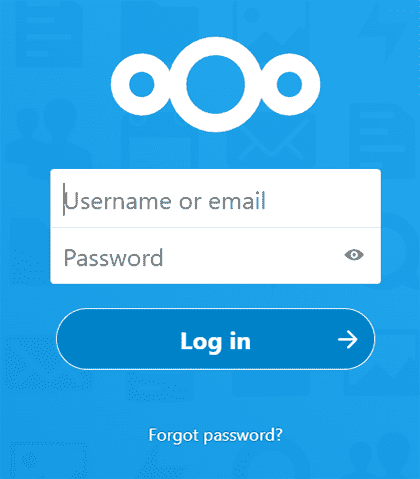
The Basic NextCloud Installation on Ubuntu 22.04 is completed, Now we are going to Work on the Performance and Security.

Step5. Install and Configure PHP-FPM with Apache
Here we will install PHP-FPM, which is faster than the mpm-prefork module, which is the default method of executing php files on Apache.
1. Install php-fpm
apt install php8.1-fpm
service php8.1-fpm status
2. Check the php-fpm version and Socket.
php-fpm8.1 -v
ls -la /var/run/php/php8.1-fpm.sock
3. Disable Apache prefork module
a2dismod php8.1
a2dismod mpm_prefork
4. Enable php-fpm
a2enmod mpm_event proxy_fcgi setenvif
a2enconf php8.1-fpm
5. set required php.ini variables
vi /etc/php/8.1/fpm/php.ini

upload_max_filesize = 64M
post_max_size = 96M
memory_limit = 512M
max_execution_time = 600
max_input_vars = 3000
max_input_time = 1000

:x
6. php-fpm pool Configurations
vi /etc/php/8.1/fpm/pool.d/www.conf

pm.max_children = 64
pm.start_servers = 16
pm.min_spare_servers = 16
pm.max_spare_servers = 32

:x
service php8.1-fpm restart7. Apache directives for php files processing by PHP-FPM
vi /etc/apache2/sites-enabled/000-default.conf

<VirtualHost *:80>

	ServerAdmin webmaster@localhost
	DocumentRoot /var/www/nextcloud

	<Directory /var/www/nextcloud>
          Options Indexes FollowSymLinks
          AllowOverride All
          Require all granted
	</Directory>

	<FilesMatch ".php$">
         SetHandler "proxy:unix:/var/run/php/php8.1-fpm.sock|fcgi://localhost/"
	</FilesMatch>

	ErrorLog ${APACHE_LOG_DIR}/error.log
	CustomLog ${APACHE_LOG_DIR}/access.log combined

</VirtualHost>

:x   // Save the File
service apache2 restartStep6. Create info.php Page for PHP feature check
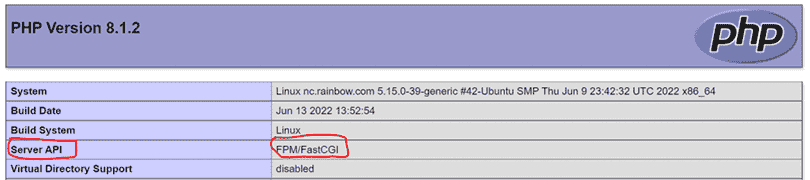
Create an info.php page, it will show us whether php-fpm, opcache, apcu are enabled with the php.
cd /var/www/nextcloud

vi info.php
    <?php phpinfo(); ?>
:x
Now Browse http://nc.mailserverguru.com/info.php, it will show “Server API FPM/FastCGI” if the php-fpm is enabled on the PHP.
Step7. Enable Opcache in php
Opcache is a caching engine for PHP. It stores precompiled script bytecode in shared memory, so parsing PHP scripts on each request won’t be necessary. It increases php file execution and website loading performance.
vi /etc/php/8.1/fpm/php.ini

opcache.enable=1
opcache.enable_cli=1
opcache.interned_strings_buffer=8
opcache.max_accelerated_files=10000
opcache.memory_consumption=128
opcache.save_comments=1
opcache.revalidate_freq=60

:x- Now, Restart apache and php-fpm
systemctl restart php8.1-fpm
systemctl restart apache2
Now, Check http://nc.mailserverguru.com/info.php again, it will show the “Opcache is Up and Running”

Step8. Enable APCu in php
APCu is the user data caching. It is a local cache for systems. Nextcloud uses this for memory caching.
1. Install APCu
apt install php8.1-apcu2. Configure Nextcloud to use APCu for memory caching.
vi /var/www/nextcloud/config/config.php

  'memcache.local' => '\OC\Memcache\APCu',

:x- Restart php-fpm and apache
systemctl restart php8.1-fpm
systemctl restart apache2
Now, Check the http://nc.mailserverguru.com/info.php again, it will show the “APCu support Enabled”

Step9. Install and Configure Redis
In Nextcloud, Redis is used for local and distributed caching as well as transactional file locking. we used APCu for Local Cahing which is faster than Redis. We will use Redis for File locking. Nextcloud’s Transactional File Locking mechanism locks files to avoid file corruption during normal operation.
1. Install Redis Server and Redis php extension
apt-get install redis-server php-redis- Start and Enable Redis
systemctl start redis-server
systemctl enable redis-server
2. Configure Redis to use Unix Socket than ports
vi /etc/redis/redis.conf

port 0
unixsocket /var/run/redis/redis.sock
unixsocketperm 770

:x
3. Add Apache user to the Redis group
usermod -a -G redis www-data4. Configure Nextcloud for using Redis for File Locking
vi /var/www/nextcloud/config/config.php

'filelocking.enabled' => 'true',
'memcache.locking' => '\OC\Memcache\Redis',
'redis' => [
     'host'     => '/var/run/redis/redis.sock',
     'port'     => 0,
     'dbindex'  => 0,
     'password' => '',
     'timeout'  => 1.5,
],

:x
5. Enable Redis session locking in PHP
vi /etc/php/8.1/fpm/php.ini

redis.session.locking_enabled=1
redis.session.lock_retries=-1
redis.session.lock_wait_time=10000

:x- Now, Restart php-fpm and apache
systemctl restart php8.1-fpm
systemctl restart apache2
Now, we can check Redis use, (by enabling the Redis port in the Redis configuration) by running the command “redis-cli MONITOR“, during Nextcloud loading it will show live data on the screen.
Now, that we have finished Performance improvement steps. We are going to work for the Security, First of all, we will install an SSL certificate for Nextcloud.
Step10. Install SSL and Enable HTTP2
1. We will install the LetsEncrypt certificate, so, first, we need the Certbot tools.
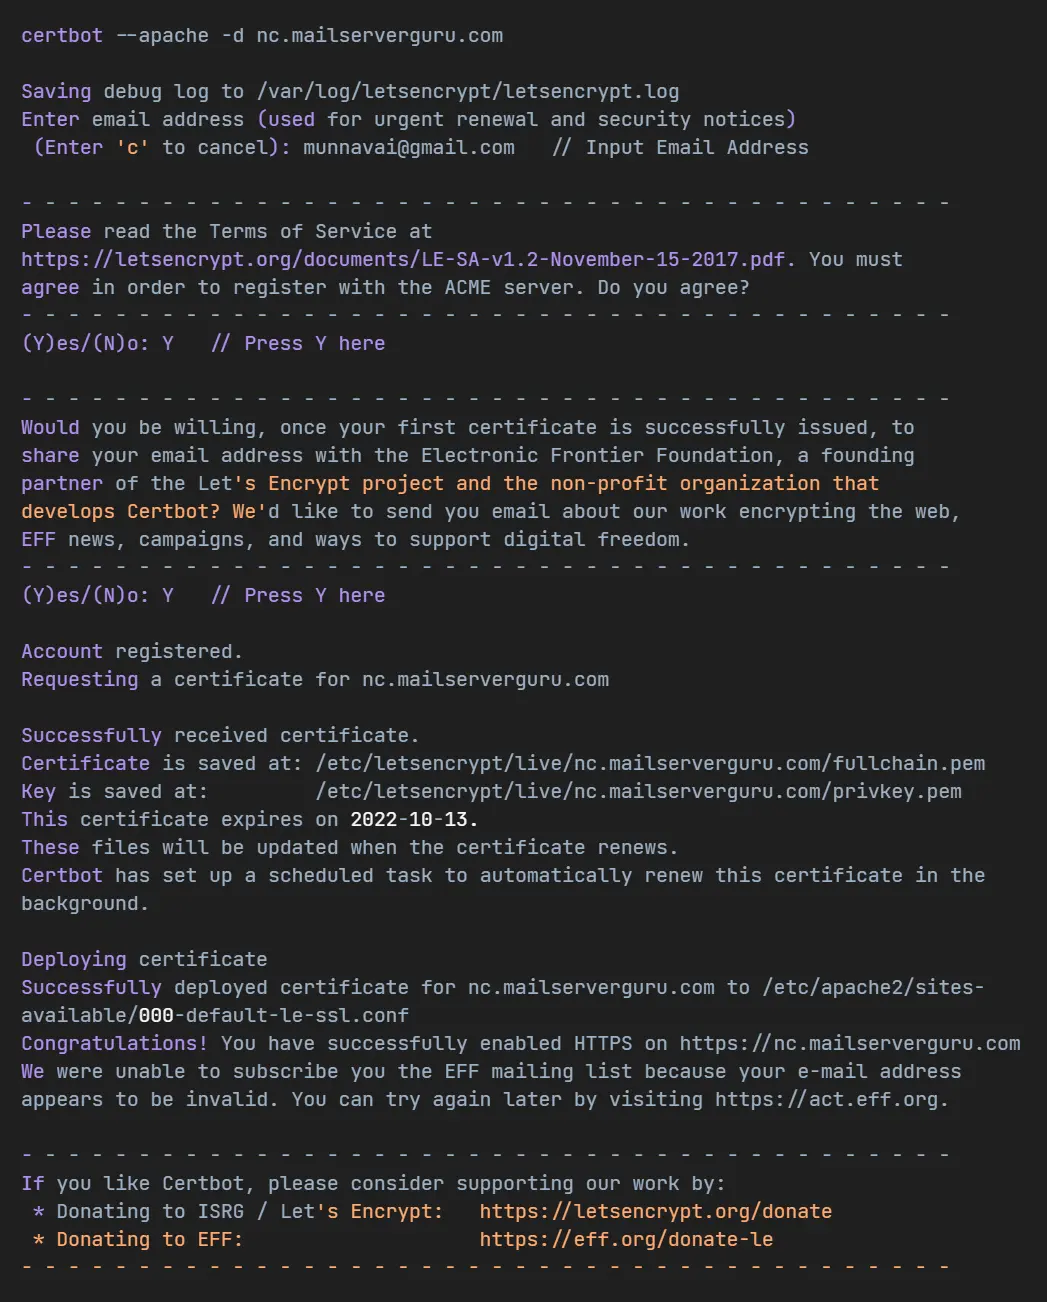
apt-get install python3-certbot-apache -y2. with the Certbot tool, let’s request a Certificate for our domain.
certbot --apache -d nc.mailserverguru.com- Please follow the Image, Provide your Email and Accept the Terms to generate the SSL
3. Enable apache HTTP2 module and configure site for the http2 protocols
a2enmod http2vi /etc/apache2/sites-enabled/000-default-le-ssl.conf
<VirtualHost *:443>
Protocols h2 h2c http/1.1
ServerAdmin webmaster@localhost
DocumentRoot /var/www/nextcloud
......
:x // Save4. Now, Restart Apache
systemctl restart apache25. Test the http2 protocol, by sending an http2 request to the web server.
curl -I --http2 -s https://nc.mailserverguru.com/ | grep HTTP
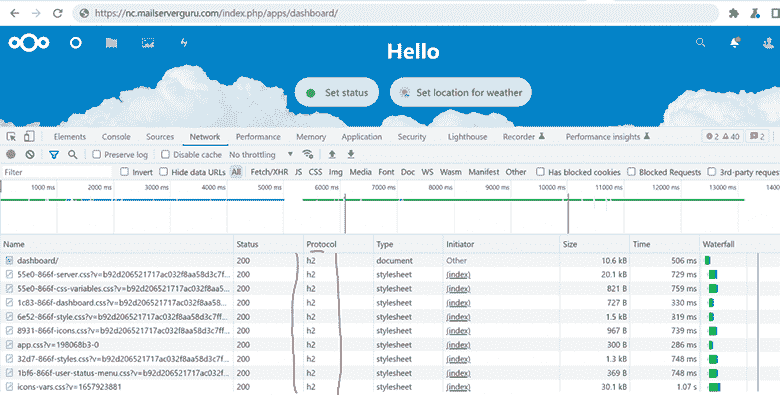
HTTP/2 200Or, we can Inspect the Browser while accessing Nextcloud URL, we can easily see the protocol column from the Network tab, and it will show h2 as the protocol which is http2.
6. HTTP Strict Transport Security, which instructs browsers not to allow any connection to the Nextcloud instance using HTTP, prevents man-in-the-middle attacks.
<VirtualHost *:443>
  ServerName nc.mailserverguru.com

<IfModule mod_headers.c>
    Header always set Strict-Transport-Security "max-age=15552000; includeSubDomains"
</IfModule>

</VirtualHost>
Step11. Pretty URL’s
Pretty URLs remove the "index.php“ part in all Nextcloud URLs. It will make URLs shorter and prettier.
vi /var/www/nextcloud/config/config.php

    'htaccess.RewriteBase' => '/',
:x- This command will update the .htaccess file for the redirection
sudo -u www-data php --define apc.enable_cli=1 /var/www/nextcloud/occ maintenance:update:htaccessSo, this is it.. We have done our setup 🤗
If you want to learn more about Nextcloud, you can visit this YouTube Playlist
Now It’s Your Turn
I hope this guide will help you to Install NextCloud On Ubuntu 22.04 LTS. I have tried to show you every step in detail.
If you face any issue or have any drought on any stage, please let me know on the comment section below.
Thanks !! 👍


Hi mailserverguru.com admin, Thanks for the well-structured and well-presented post!
Dear mailserverguru.com admin, Your posts are always a great source of knowledge.
You are most Welcome ❤️
I believe this is one of the most vital information for me.
And i’m happy reading your article. But should observation on some general things, The site taste is wonderful, the articles is
in point of fact great : D. Excellent activity, cheers
You are most Welcome ❤️
Appreciate the recommendation. Will try it out.
You are most Welcome ❤️
Hi,
thank you very much for this tutorial. I got stuck before Step 10. I geta black screen with the following message when accessing nextcloud with ip:
“Internal Server Error
The server encountered an internal error and was unable to complete your request.
Please contact the server administrator if this error reappears multiple times, please include the technical details below in your report.
More details can be found in the webserver log.
”
Any idea of what this might be?
Thank you!
Great guide! I followed your steps to install NextCloud on my Ubuntu 22.04 LTS, and it worked perfectly. The clear instructions made the process so much easier. Thanks for sharing!
You are most welcome ❤️
Thank you for the detailed guide! I found the step-by-step instructions very easy to follow. Just completed the installation, and everything is working smoothly. Looking forward to exploring all the features NextCloud offers.
You are most welcome ❤️
This guide was incredibly helpful! I followed the steps to install NextCloud on my Ubuntu 22.04 LTS server, and everything worked smoothly. Appreciate the clear explanations and screenshots. Thank you for sharing!
You are most welcome ❤️
Great guide! I followed your steps to install NextCloud on my Ubuntu 22.04 LTS server, and everything went smoothly. The clear instructions made it easy to set up my own cloud storage. Thanks for sharing!
You are most welcome ❤️
Thank you for the detailed guide on installing NextCloud on Ubuntu 22.04 LTS! I found the step-by-step instructions really easy to follow, and the troubleshooting tips were especially helpful. Can’t wait to start using my own NextCloud instance!
You are most welcome ❤️
Thanks for the detailed guide! I found the step-by-step instructions really helpful. I was able to get NextCloud up and running on my Ubuntu 22.04 LTS in no time. Your tips on configuration were especially useful. Keep up the great work!
You are most welcome ❤️
Thank you for this comprehensive guide! I found the step-by-step instructions really helpful, especially the troubleshooting tips. I was able to set up NextCloud on my Ubuntu 22.04 LTS server without any issues. Looking forward to more posts like this!
You are most welcome ❤️
Great guide! I followed your steps for installing NextCloud on Ubuntu 22.04 LTS, and it went smoothly. The screenshots were especially helpful. Thanks for providing such a thorough walkthrough!
You are most welcome ❤️
Thanks for the detailed guide! I followed your steps to install NextCloud on my Ubuntu 22.04 LTS server, and everything worked smoothly. The screenshots really helped. Just a heads-up for anyone new, make sure to check the server requirements before starting the installation. Great job!
You are most welcome ❤️
What steps should be taken for routine maintenance to keep a Nextcloud installation secure and efficient?
Regard animasi
Thumbs up, well done and thank you.
Thanks for the comprehensive guide! I followed your steps to install NextCloud on my Ubuntu 22.04 LTS server, and it worked flawlessly. The tips on configuring SSL were especially helpful. Looking forward to exploring all the features of NextCloud now!
You are welcome !!