In this post, I have explained iTop Installation on Ubuntu 24.04. You can follow this step-by-step guide to install the latest iTop 3.2 on Ubuntu 24.04. I have also provided the detailed guidelines for increasing the iTop performance and security.
If you want to see iTop Installation for Ubuntu 16.04 or Ubuntu 22.04 you can follow the links.
What is iTop?
iTop stands for IT Operations Portal. it is an open-source, web-based IT service management platform that includes a customizable CMDB and Helpdesk system. It is ITIL compliant and fully customizable. It has a high number of free add-ons which helps to streamline your organization’s IT operations.
iTop is designed to help organizations manage IT infrastructure and services according to ITIL best practices. It features a centralized CMDB, incident, change, and problem management, service request handling, and service level monitoring. IT service management becomes easier for iTop’s flexibility and comprehensive capabilities.
This iTop Installation Guide will give you a brief overview of the iTop’s capabilities and features.
iTop’s Comprehensive Features:
- User request management
- HelpDesk and Incident Management
- Service and Contract Management
- Problem management
- Working schedule management
- Change Management
- Configurable notifications
- Configuration Management
- Automatic SLA management
- Ticket creation and update by eMail
- Custom CMDB
- Automatic impact analysis
- CSV and Excel import/export
- Consistency audit to check data quality
- Data synchronization engine
- Reporting tools
- User satisfaction surveys
- User request templates
- Graphical impact analysis
- REST/JSON API
- Automatic eMail replies
- ITSM Designer – CMDB customization
iTop Installation Overview
We will walk you through a detailed iTop Installation on Ubuntu 24.04 step-by-step. This guide is very comprehensive, and we have shown the Installation in a very approachable manner.
iTop is a web-based application built with PHP, so providing the utmost server performance is crucial for iTop application performance. Security hardening from the server and application sides is also vital.
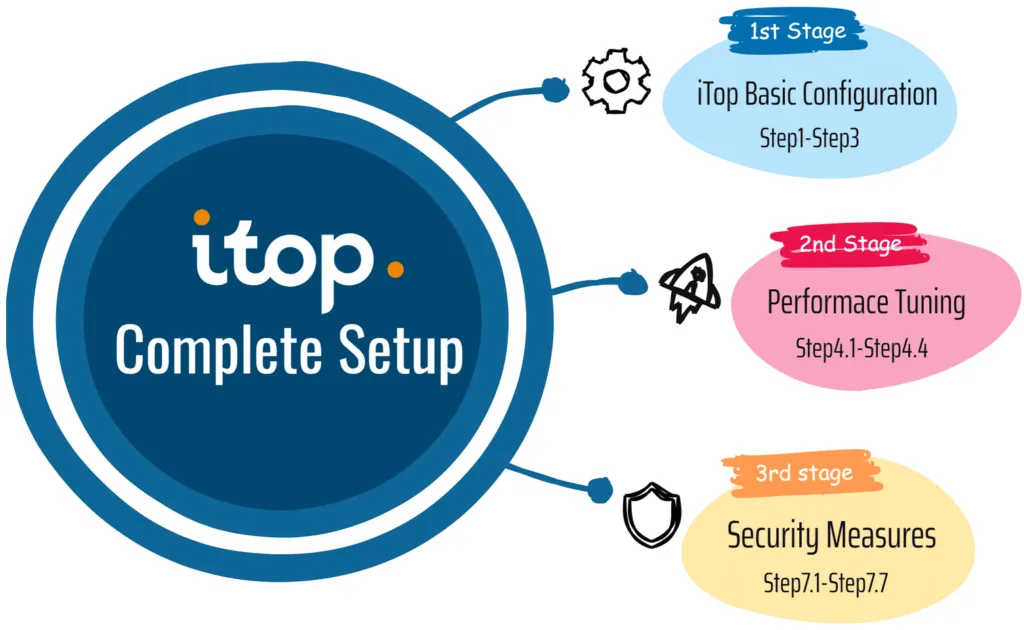
We have divided the iTop Installation into three stages. First, we discussed the basic requirements of the iTop Installation. Then, we customized the configuration to increase the iTop’s performance. After the iTop Installation, we further changed the server configuration and applied various security measures.
These three-stage configurations give a straightforward approach to Install and configure iTop properly on Ubuntu 24.04.

This video guide will help you to follow the instructions properly and complete the setup.
Step #1: Update The System
It is always recommended to update and Upgrade the system before the Installation.
apt update -y && apt upgrade -yStep #2: Install Apache and PHP Modules
We need to install Apache and the required PHP Modules for iTop. We will run iTop from the default Apache document root directory for direct access with the hostname (e.g, http://example.com) without appending /itop in the URL.
1. Install Apache2.
apt install apache2 -y2. Install Required PHP Modules for iTop.
apt install php8.3 php8.3-mysql php8.3-ldap php8.3-cli php8.3-soap \
php8.3-xml php8.3-gd php8.3-zip php8.3-mbstring php8.3-curl php8.3-imap \
graphviz acl unzip -y
3. Configure the iTop root directory by adding the following <Directory> options to the default virtual host configuration:
- Edit /etc/apache2/sites-enabled/000-default.conf
<VirtualHost *:80>

	ServerAdmin webmaster@localhost
	DocumentRoot /var/www/html/

	<Directory /var/www/html>
          Options Indexes FollowSymLinks
          AllowOverride All
          Require all granted
	</Directory>

	ErrorLog ${APACHE_LOG_DIR}/error.log
	CustomLog ${APACHE_LOG_DIR}/access.log combined

</VirtualHost>
4. Now, Remove the default index.html file and Restart Apache.
rm -rf /var/www/html/index.html
systemctl restart apache2
Step #3: Install and Configure MariaDB
iTop needs a database, we can use either MySQL or MariaDB database. iTop stores all the application’s data, including information about IT assets, configurations, users, tickets, changes, and other operational data in the database. iTop can handle large amounts of data and complex queries effectively.
1. Install MariaDB
apt install mariadb-server -y2. Check the versions
root@itop:~# mariadb -V
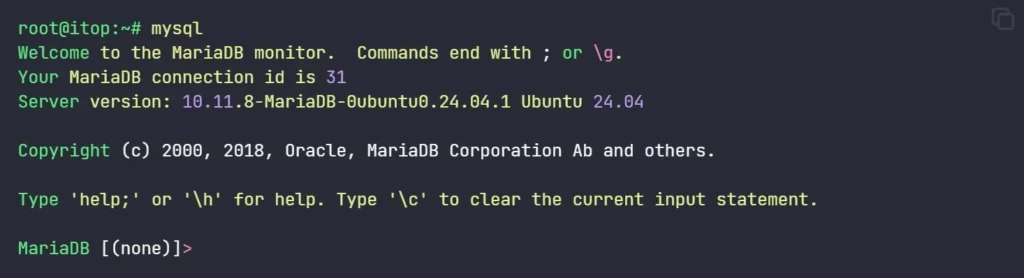
mariadb Ver 15.1 Distrib 10.11.8-MariaDB, for debian-linux-gnu (x86_64) 3. Login to MariaDB by executing “mysql” command. It will log in to MariaDB prompt without password.
4. Create a database and database user for iTop Installation. assign full privileges to the user of the iTop database. copy the below SQL statements and execute them on the MariaDB prompt.
CREATE DATABASE itop character set utf8 collate utf8_bin;
CREATE USER 'itop'@'localhost' IDENTIFIED BY 'I!T66@@3P!P';
GRANT ALL PRIVILEGES ON itop.* to 'itop'@'localhost';
FLUSH PRIVILEGES;
QUIT;
5. Now Restart the MariaDB service
systemctl restart mariadb.serviceStep #3.1: Install PhpMyadmin (Optional)
Integrating PHPMyAdmin into the iTop Ubuntu installation enhances security, it will eliminate the need for remote access to iTop server for database administration. We are restricting iTop to localhost access only.
1. Login to mysql again with the “mysql” command and execute the below SQL Statements. it will create the PhpMyadmin admin user with the password.
CREATE USER 'pmadmin'@'localhost' IDENTIFIED BY 'PM6Y!@!55';
GRANT ALL PRIVILEGES ON *.* TO 'pmadmin'@'localhost' WITH GRANT OPTION;
FLUSH PRIVILEGES;
QUIT;
2. Install PhpMyadmin
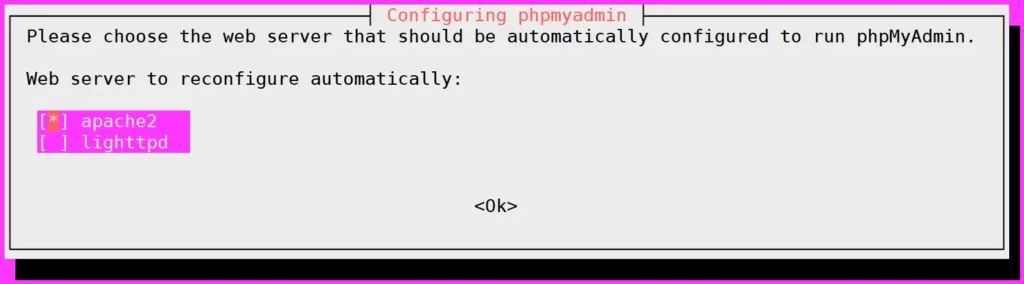
apt install phpmyadmin -yDuring PhpMyadmin Installation it will prompt for various input from the user, follow the screenshots to complete the Installation.
- Select the web server to ‘apache2‘, then OK.
- Select Yes to confirm the database for phpMyAdmin via dbconfig-common

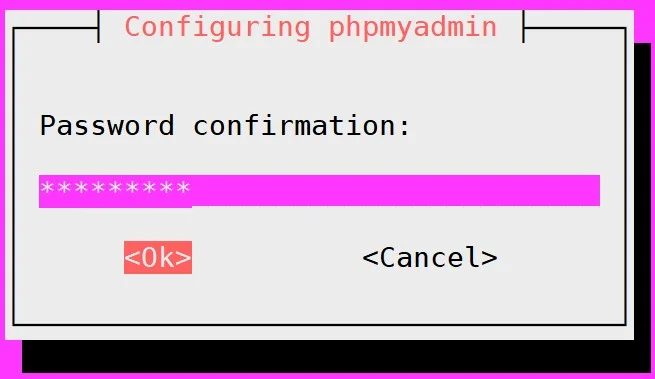
- Now input the new password for phpMyAdmin user and repeat the password.
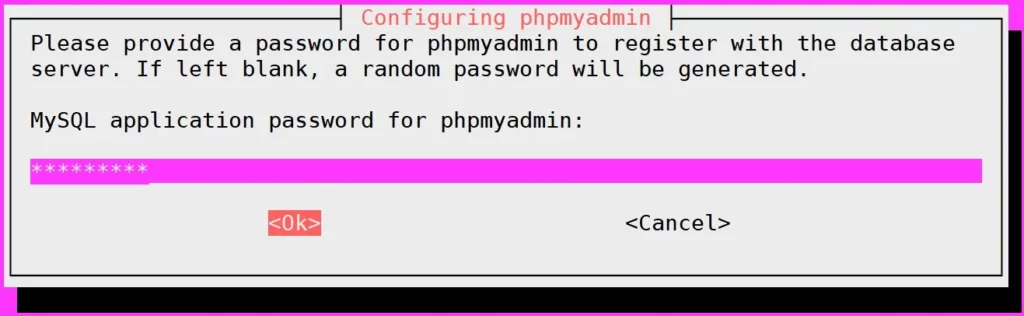
- Repeat your password:
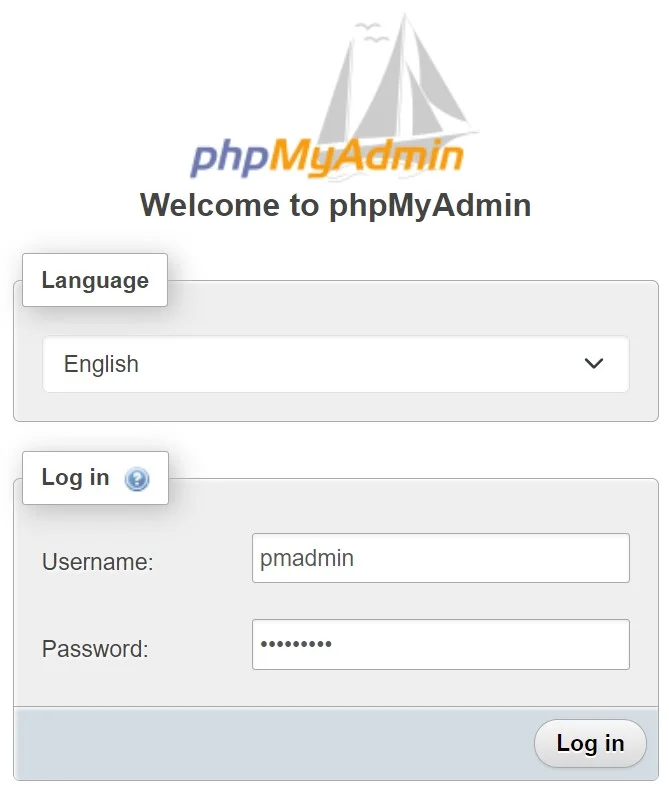
After the installation is complete, open your web browser and visit http://example.com/phpmyadmin. If your installation is successful, you will see the phpMyAdmin login page.
Log in with the MariaDB user we have created earlier, then click Login.
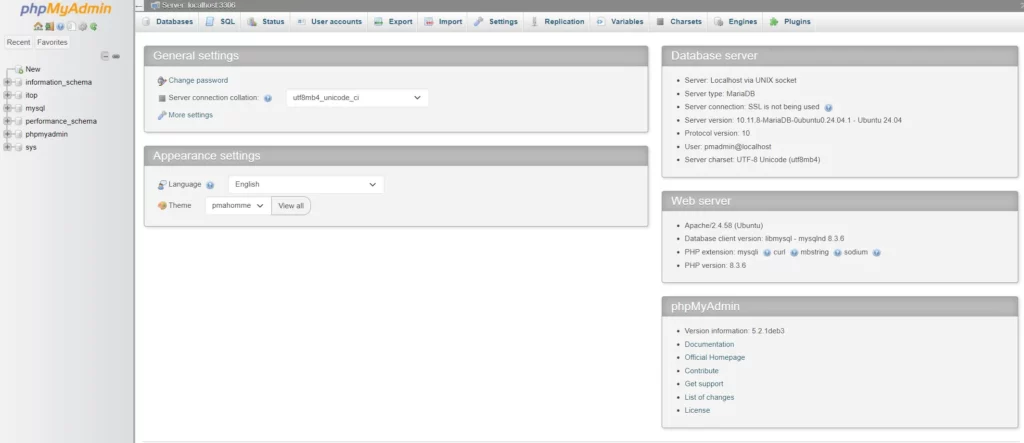
- If your authentication is successful, you should get the phpMyAdmin dashboard like the following, now you can administer the iTop database from the phpMyAdmin Web Interface.
Step #4: iTop Performance Tuning
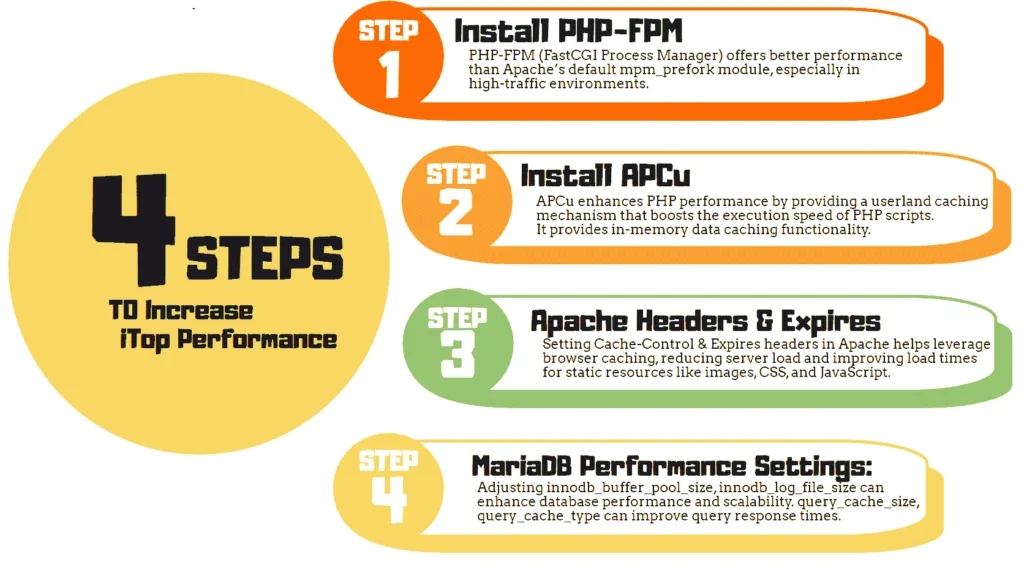
Before iTop Installation, consider the following recommendations to optimize iTop performance:
1. Install PHP-FPM: PHP-FPM (FastCGI Process Manager) offers better performance than Apache’s default mpm_prefork module, especially in high-traffic environments.
2. Install APCu: APCu enhances PHP performance by providing a userland caching mechanism that boosts the execution speed of PHP scripts. It provides in-memory data caching functionality.
3. Apache Headers & Expires Module: Setting appropriate headers (Cache-Control, Expires) in Apache helps leverage browser caching, reducing server load and improving load times for static resources like images, CSS, and JavaScript.
4. MariaDB Performance Settings: Adjusting MariaDB configuration parameters (such as innodb_buffer_pool_size, innodb_log_file_size, etc.) can significantly enhance database performance and scalability. Enabling the query cache (query_cache_size, query_cache_type) can improve query response times and overall database performance.
Now, we will install and configure each of the recommendatioins to increase iTop performance.
Step #4.1: Configure PHP-FPM
During iTop installation on Ubuntu 24.04, PHP-FPM is the recommended PHP processor to get higher performance. PHP-FPM enhances PHP’s performance by managing pools of PHP worker processes, ensuring efficient and fast execution of PHP scripts. We will install and configure PHP-FPM, and instruct Apache to use PHP-FPM for PHP file processing.
1. Install PHP-FPM
apt install php8.3-fpm -y2. Check the status of PHP-FPM. It must be running and a socket must be created.
service php8.3-fpm status
ls -la /var/run/php/php8.3-fpm.sock
3. Disable mod_php and prefork module
a2dismod php8.3
a2dismod mpm_prefork
4. Enable PHP Modules and PHP-FPM Configuration on Apache.
a2enmod mpm_event proxy_fcgi setenvif
a2enconf php8.3-fpm
5. Restart Apache and PHP-FPM
systemctl restart apache2
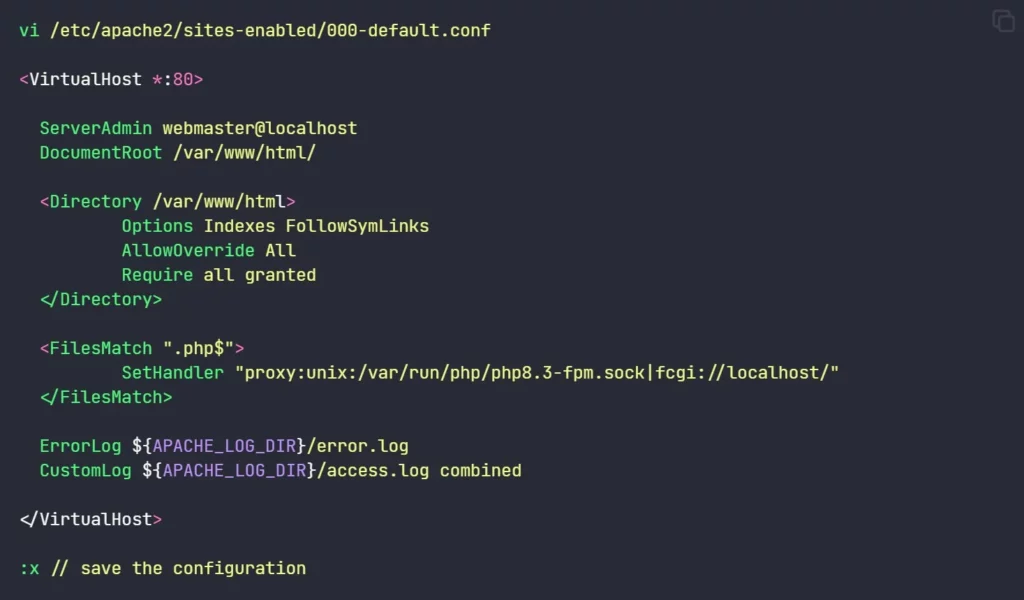
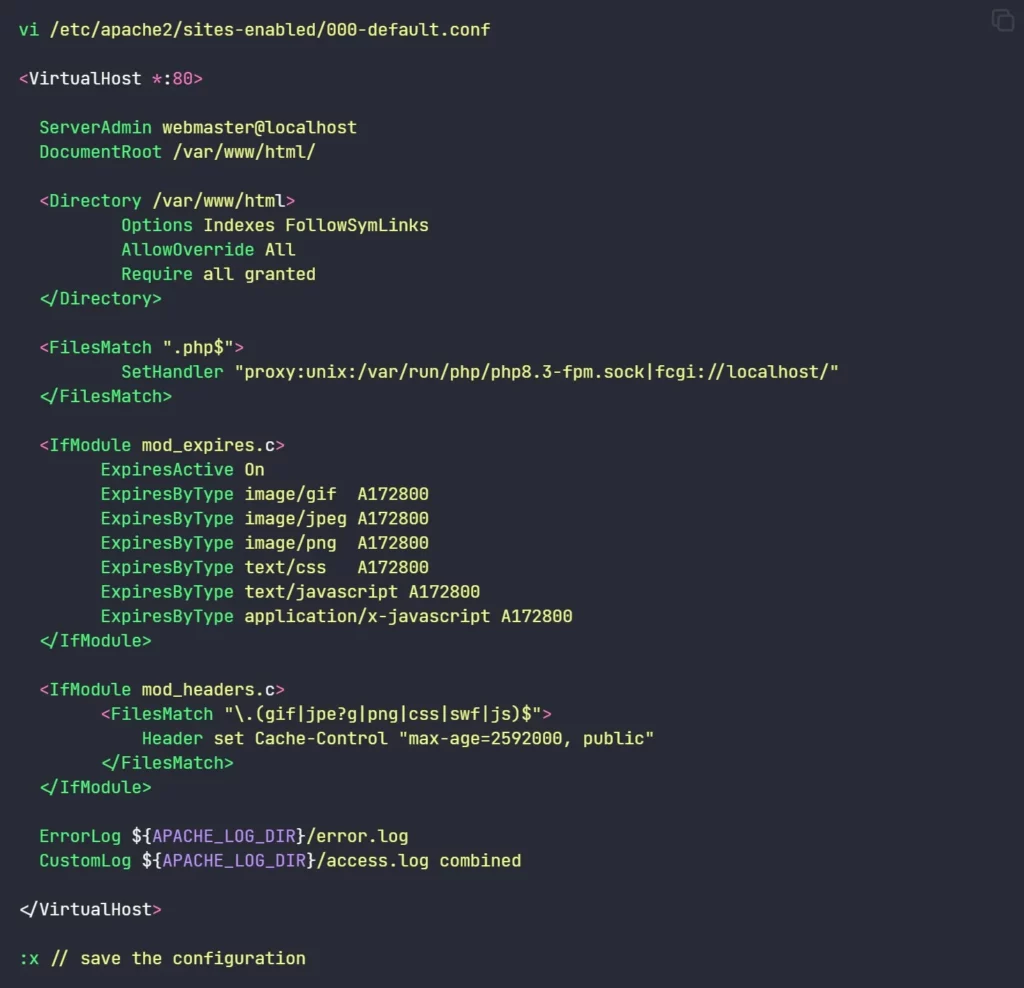
service php8.3-fpm restart6. Configure Apache to use PHP-FPM. we need to provide this <FilesMatch> directive under the virtual host configuration to instruct Apache to use PHP-FPM for PHP file processing. the final virtual host configuration will look like this:
vi /etc/apache2/sites-enabled/000-default.conf

<VirtualHost *:80>

	<FilesMatch ".php$">
          SetHandler "proxy:unix:/var/run/php/php8.3-fpm.sock|fcgi://localhost/"
	</FilesMatch>

</VirtualHost>

:x // save the configuration- the virtualhost configuration will look like the below image
7. Restart Apache again
systemctl restart apache28. iTop uploades and stores documents, files as attachments to various objects (Tickets, CIs…). These documents are stored as binary blobs in the iTop database. In order to to safely upload and store documents, several PHP settings must be adjusted in the php.ini file. The details of the requirement are on this Official Page.
- Edit /etc/php/8.3/fpm/php.ini and provide these new values.
max_input_vars = 5000
max_execution_time = 300
file_uploads = On
upload_max_filesize = 64M
max_file_uploads = 20
post_max_size = 80M
memory_limit = 512M
max_input_time = 180
upload_tmp_dir = /tmp
9. Restart PHP-FPM again.
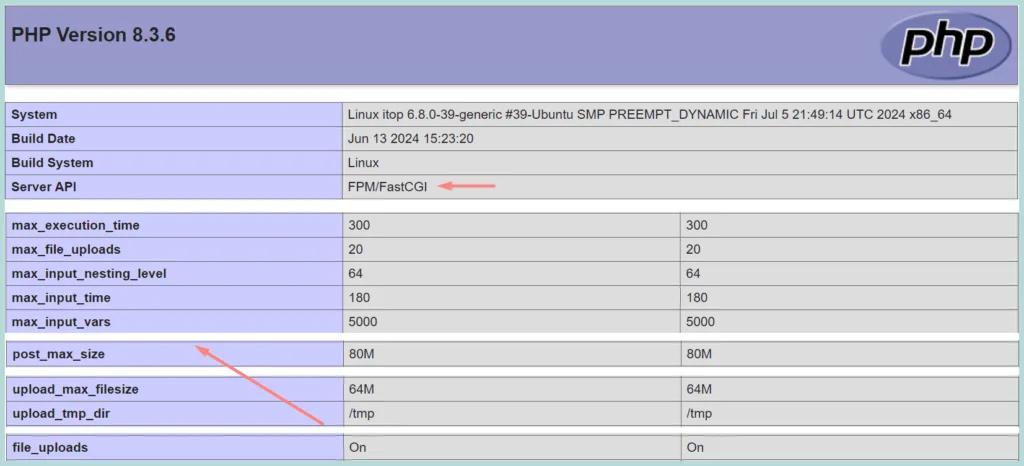
service php8.3-fpm restart10. Create info.php file to check PHP settings.
info.php file will show us all the PHP variables and modules details, whether PHP-FPM, OPCache, APCu are enabled or disabled with the PHP.
cd /var/www/html/

vi info.php
    <?php phpinfo(); ?>
:x
Now, Browse [URL]/info.php. if the PHP-FPM is enabled on the PHP. it will show “Server API FPM/FastCGI”, you can also check other variables you set on the php.ini.
Step #4.2: Install and Configure APCu
APCu significantly enhances the performance of the iTop server. It speeds up PHP applications by caching opcodes and internal structures in shared memory, reducing repeated parsing of PHP scripts. When you install iTop on Ubuntu 22.04, it is recommended that you use APCu with Apache. Configuring APCu involves installing the extension and adjusting settings for adequate memory allocation.
1. Install APCu
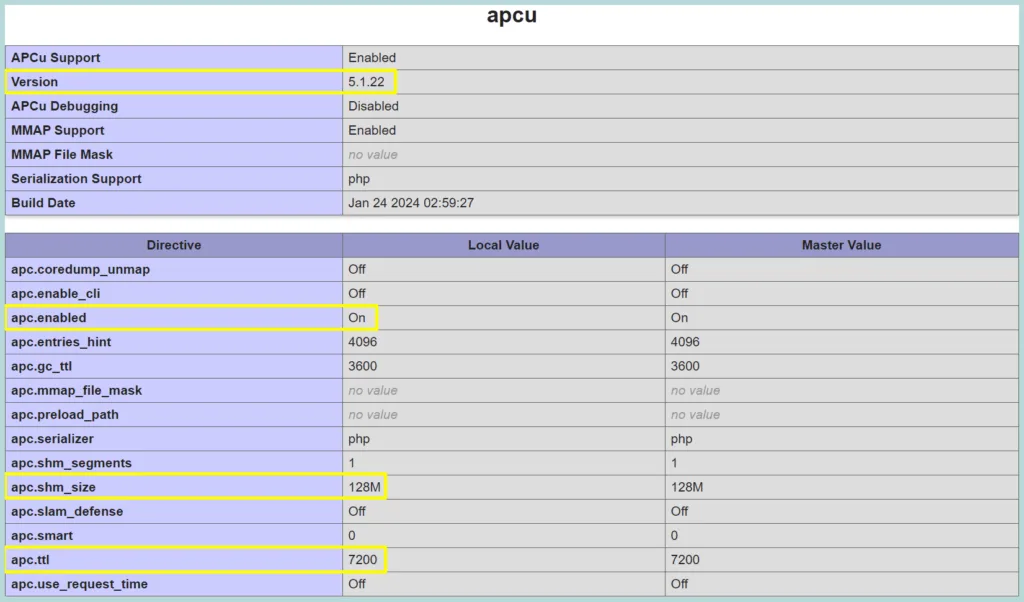
apt install php8.3-apcu2. Configure the Shared memory and TTL time.
vi /etc/php/8.3/fpm/conf.d/20-apcu.ini

extension=apcu.so
apc.shm_size=128M
apc.ttl=7200

:x
3. Restart PHP-FPM
systemctl restart php8.3-fpm⚠️ Check the APCu version, there is a warning on the official page about the APCu v5.1.12. We have installed v5.1.22 which is ok.
Step #4.3: Enable Apache Headers & Expires
1. Activate Apache’s “expire” and “headers” modules:
a2enmod expires
a2enmod headers
2. On the Apache virtualhost configuration file put the <IfModule mod_expires.c> and <IfModule mod_headers.c> directives as shown below.
vi /etc/apache2/sites-enabled/000-default.conf

<IfModule mod_expires.c>
      ExpiresActive On
      ExpiresByType image/gif  A172800
      ExpiresByType image/jpeg A172800
      ExpiresByType image/png  A172800
      ExpiresByType text/css   A172800
      ExpiresByType text/javascript A172800
      ExpiresByType application/x-javascript A172800
</IfModule>

<IfModule mod_headers.c>
      <FilesMatch "\.(gif|jpe?g|png|css|swf|js)$">
           Header set Cache-Control "max-age=2592000, public"
      </FilesMatch>
</IfModule>

:x //save the file- the virtual host configuration will look the below image.
7. Restart Apache again.
systemctl restart apache2Step #4.4: MariaDB Performance Parameters
Now, to increase MariaDB performance we need to change some parameters on the MariaDB configuraqtion file. You can find the recommendations here on the official page.
- Login to MariaDB with mysql command and Execute the below commands to check the current values
SHOW VARIABLES LIKE 'max_allowed_packet';
SHOW VARIABLES LIKE 'innodb_buffer_pool_size';
SHOW VARIABLES LIKE 'query_cache_size';
SHOW VARIABLES LIKE 'query_cache_limit';
SHOW VARIABLES LIKE 'query_cache_type';
SHOW VARIABLES LIKE 'innodb_log_file_size';
SHOW VARIABLES LIKE 'innodb_default_row_format';
SHOW VARIABLES LIKE 'innodb_large_prefix';- Now, Edit the MariaDB configuration file and provide these new values on the [mysqld] section.
vi /etc/mysql/mariadb.conf.d/50-server.cnf

[mysqld]
max_allowed_packet = 80M
innodb_buffer_pool_size = 512M
innodb_log_file_size = 800M
query_cache_size = 32M
query_cache_limit = 1M
innodb_large_prefix = ON
innodb_default_row_format = dynamic
query_cache_type = ON

:x //save the file- Now, Restart MariaDB.
systemctl restart mariadb.serviceNow, you can check the MariaDB parameters changed by executing the MySql “SHOW” Commands.
Step #5: Prepare iTop Directories For Setup
Now, for the iTop Installation we will download iTop from SourceForge, and prepare the directories. we are applying ACL on the directories. ACLs enhance security by ensuring only the www-data (Apache user) user has the required permissions to interact with the application data and logs to reduce the risk of unauthorized access to the directories.
1. Download iTop (latest version).
wget https://sourceforge.net/projects/itop/files/latest/download -O /tmp/itop.zip2. Unzip in the Apache’s Document root directory.
unzip /tmp/itop.zip "web/*" -d /var/www/html/
mv /var/www/html/web/*  /var/www/html/
rmdir /var/www/html/web
rm /tmp/itop.zip
3. Apply ACL on the data and log directory
setfacl -dR -m u:"www-data":rwX /var/www/html/data /var/www/html/log
setfacl -R -m u:"www-data":rwX /var/www/html/data /var/www/html/log
4. Create directories for the installation files and apply Apache user permissions.
cd /var/www/html
mkdir env-production env-production-build
chown www-data: conf env-production env-production-build
Step #6: Run the iTop Installation wizard
Now, we need to run the iTop installation wizard from the browser. we can launch the installation by pointing to the URL: http://yourdomain.com/setup and we have to follow the wizard.
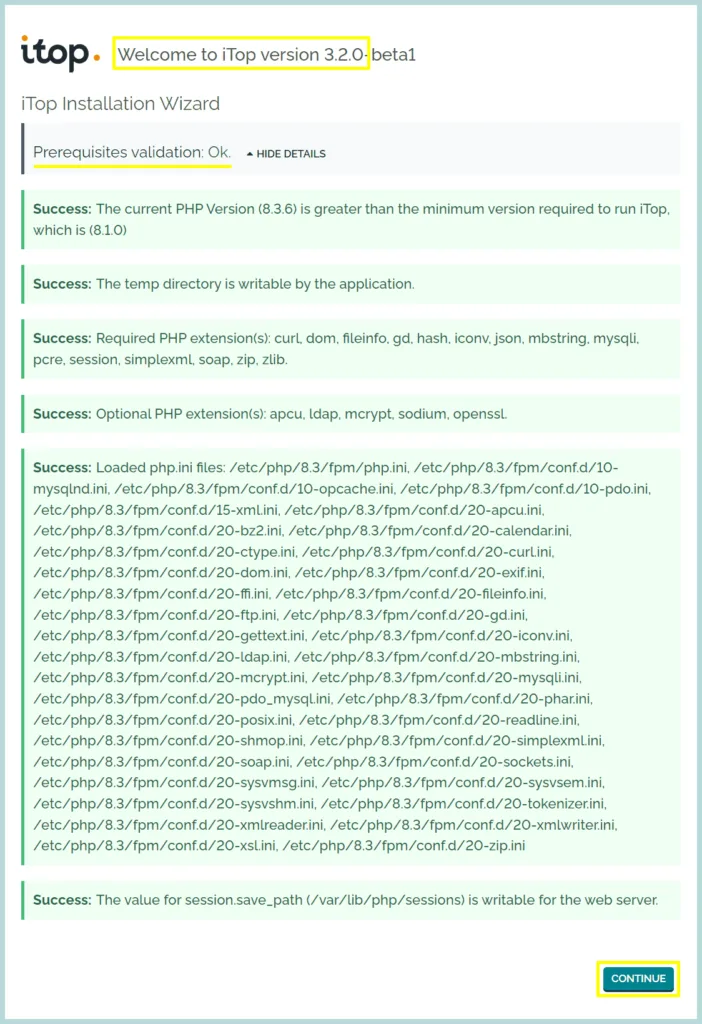
1. This is the first page of the iTop Installation wizard, it shows the “Prerequisites validation: OK” if we click the “Show Details”, it will show the detailed checks, all the prerequisites are met, and shows the message “Success” highlighted with a green text background.
Click “Continue
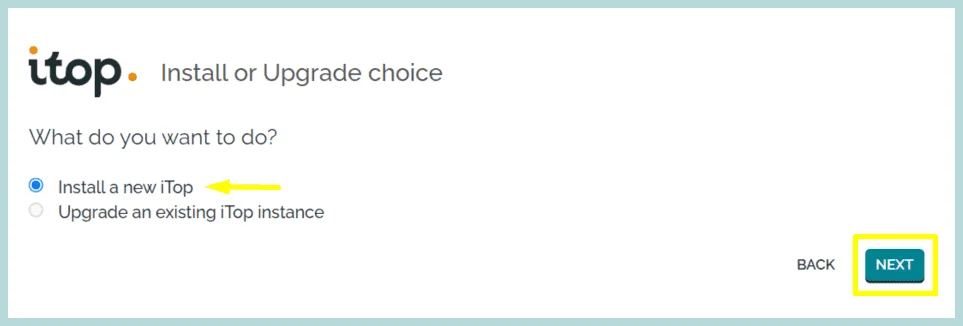
2. Select whether you want to “Install a new iTop” or want to Upgrade an existing one. we are selecting to create a new iTop Instance.
Click “Next”
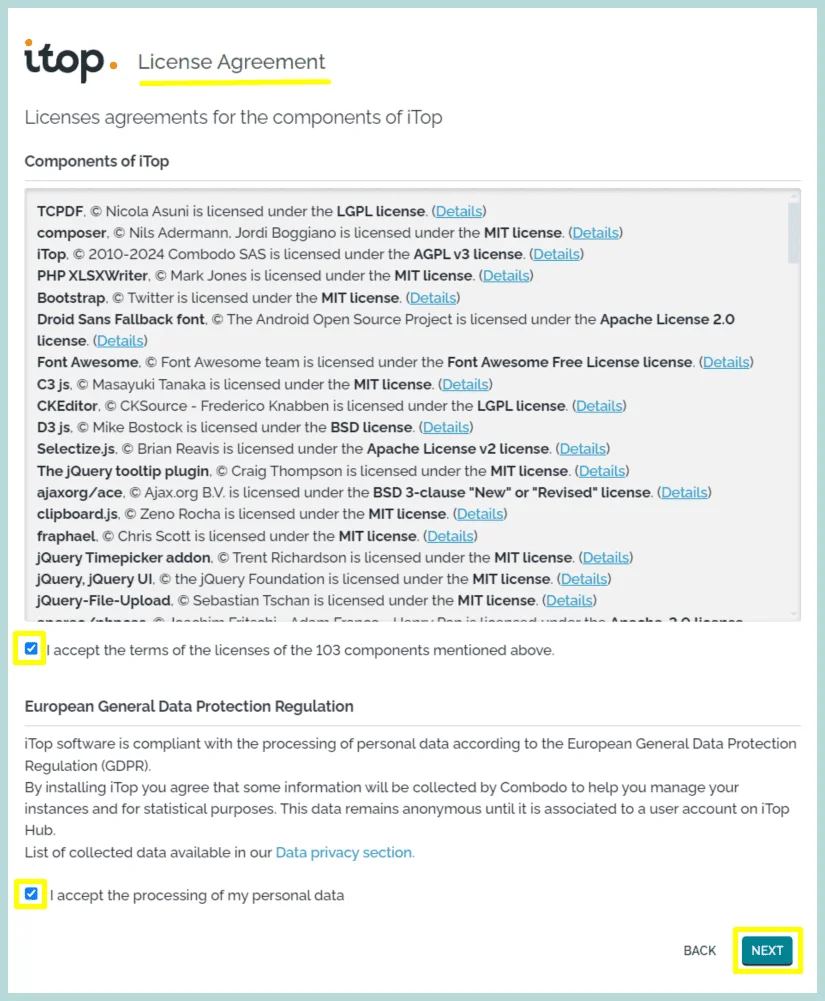
3. We must agree on the iTop License Agreement, and tick both check boxes.
Click “Next”
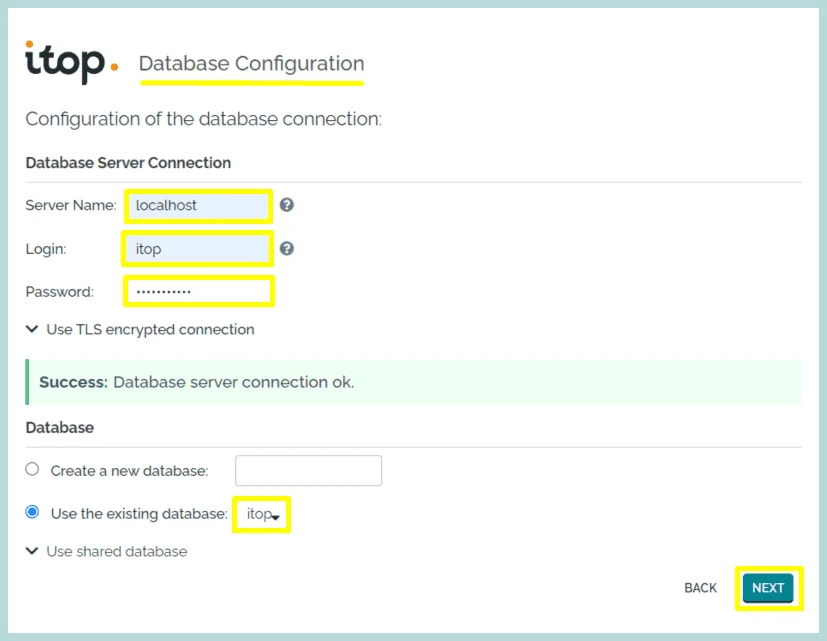
4. Now, configure the iTop database, and provide the database user and password you created earlier on the MariaDB prompt. Select the “Use the existing database” option and select the iTop database from the dropdown box.
Click “Next”
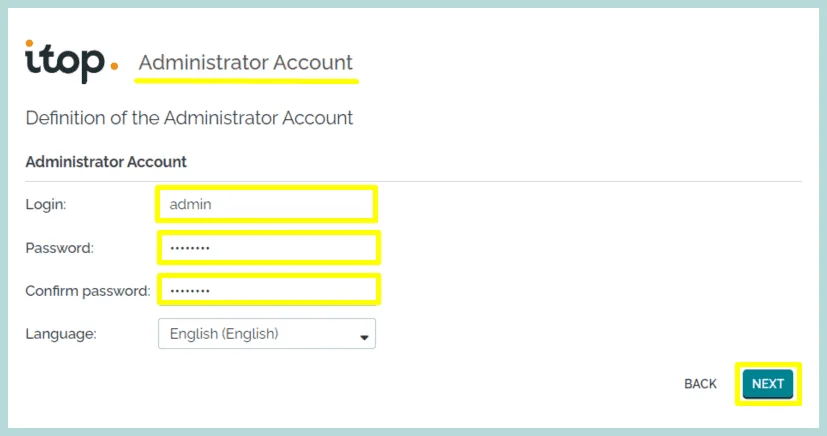
5. Define the iTop administrator account, and confirm the password.
Click “Next”
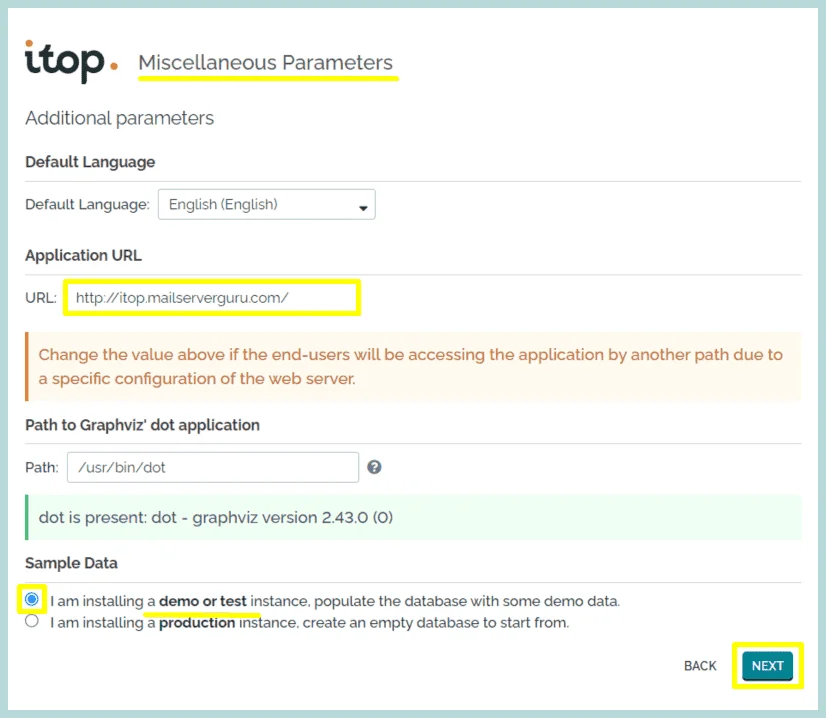
6. We can change the Application URL on this page if needed. and we can select either this installation for demo purposes or a production setup, demo setup will get sample data.
Click “Next”
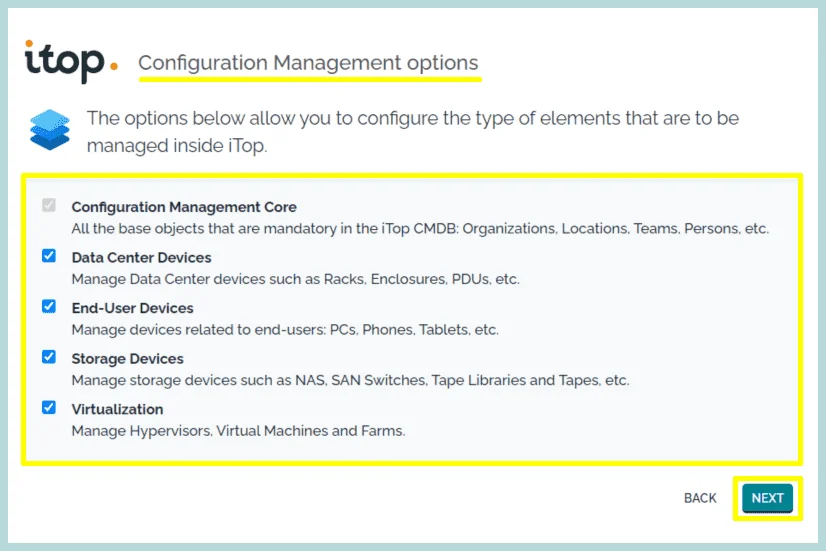
7. Select the device types you want to manage in the iTop.
Click “Next”
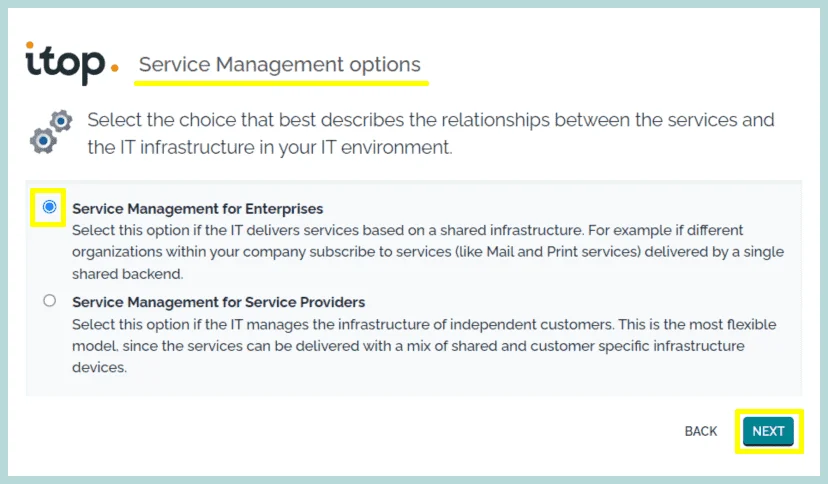
8. Select the service management Options, if you want to use iTop among different organizations within your company, select the first one “Service management for Enterprises” Or, if your customers belong to a different company select the “Service Provider” Option.
Click “Next”
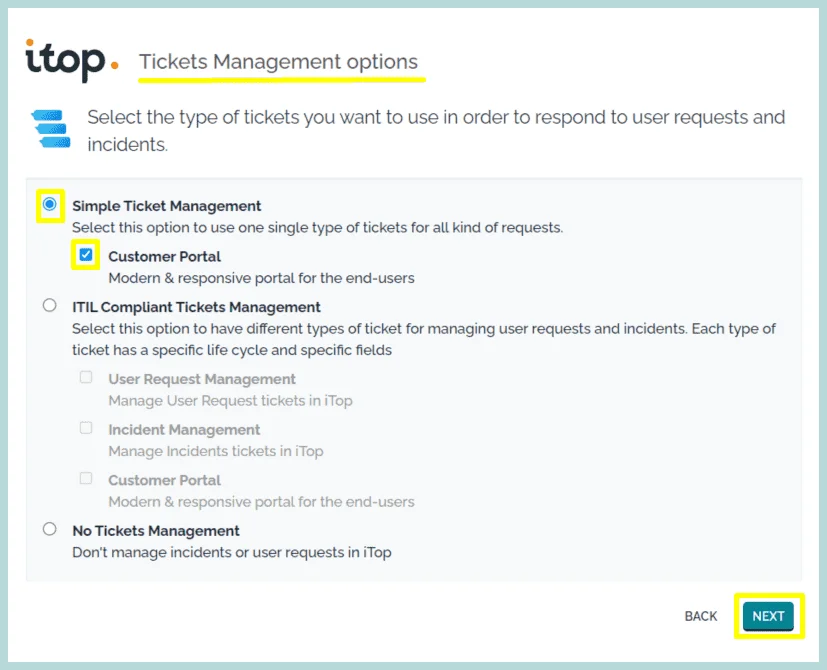
9. Select the type of Tickets you want, Simple Ticket Management or ITIL Compliant Tickets Management.
Click “Next”
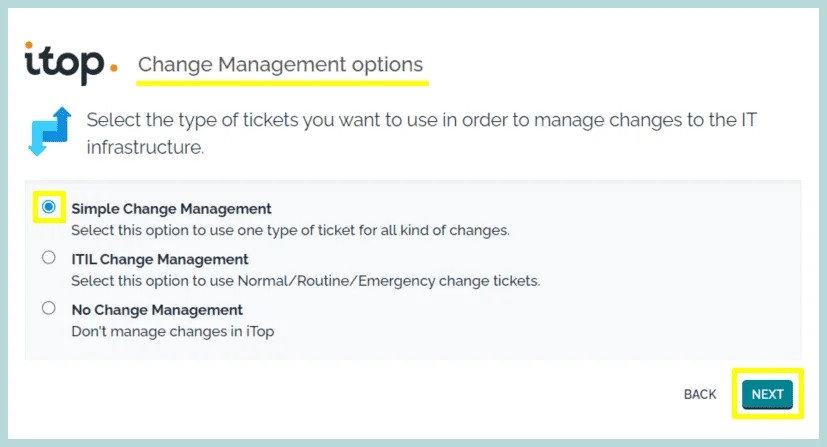
10. Select the type of Tickets you want, to manage Change management issues.
Click “Next”
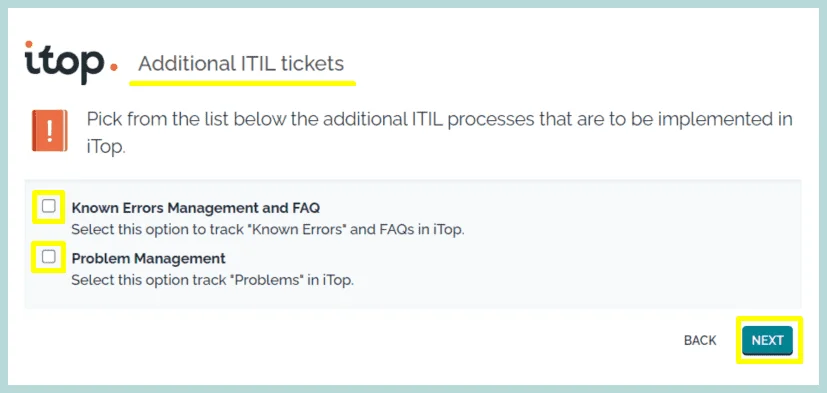
11. Select the options if you want to manage “known errors and FAQs” and “Problems” in the iTop.
Click “Next”
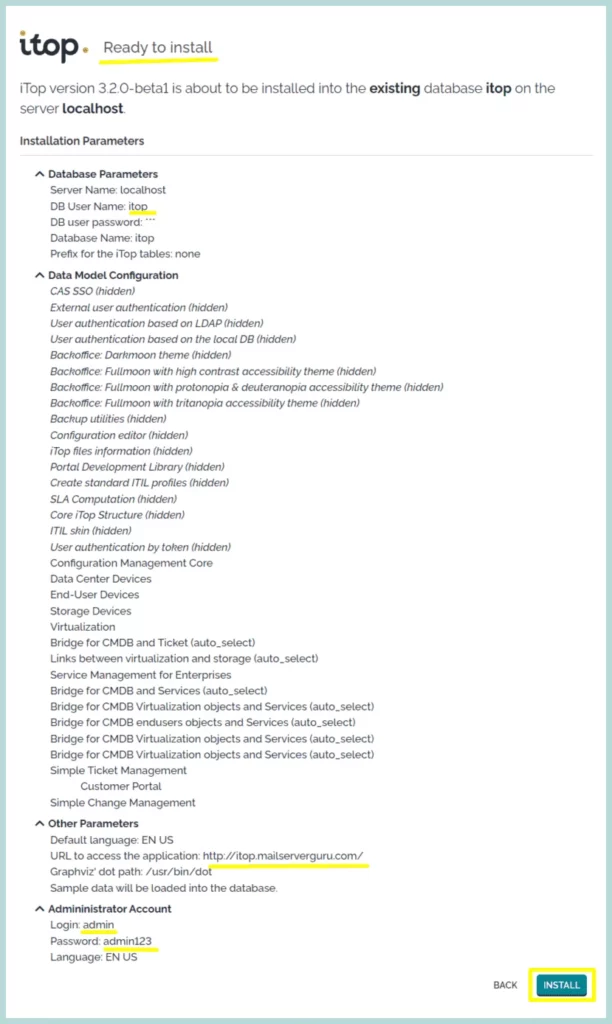
12. These are the summary of our selection, Now the iTop is ready to be installed. We can check what options we choose, we can go back and change if necessary.
Click “INSTALL”
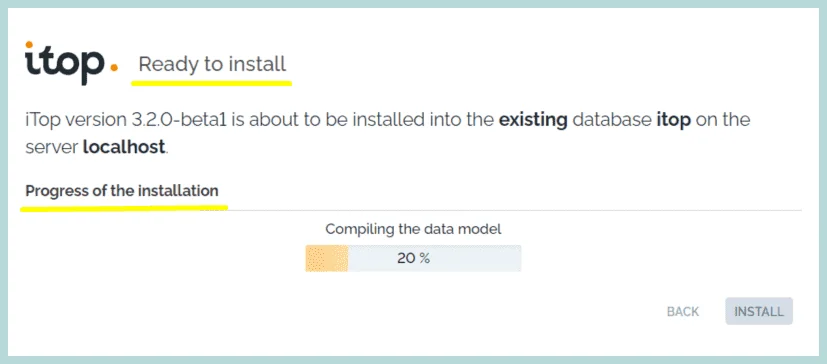
13. iTop Installations begins and shows the progress.
Click “Next”
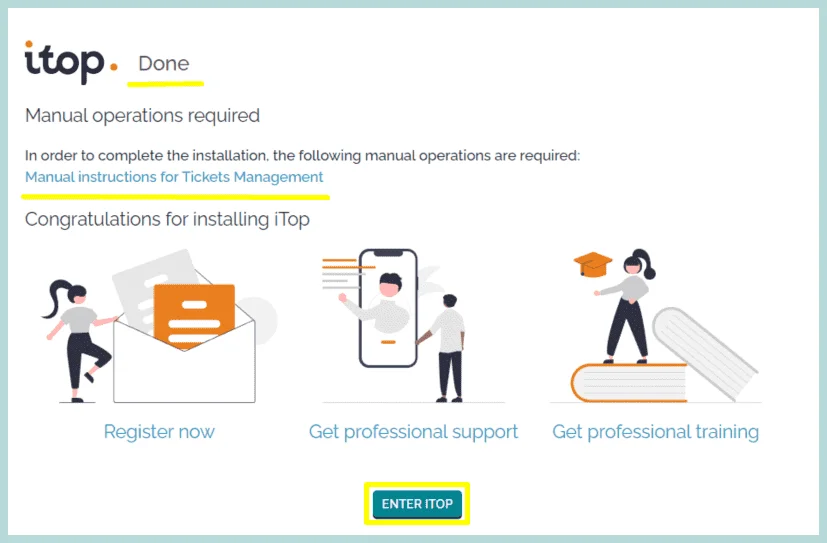
14. iTop installation is Done !! We are ready to enter iTop. we have some “Manual instructions for Ticket Management” we can click the link to visit the page, and we can also click on the image to visit the extensions and documentation.
Click “Enter iTop”
15. We have successfully logged in and landed on the iTop Welcome Page.
Click on “Got It”
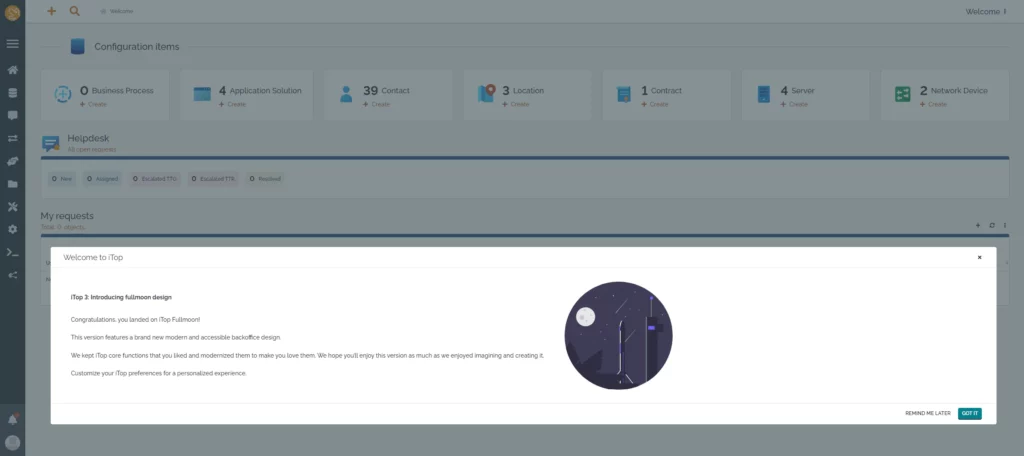
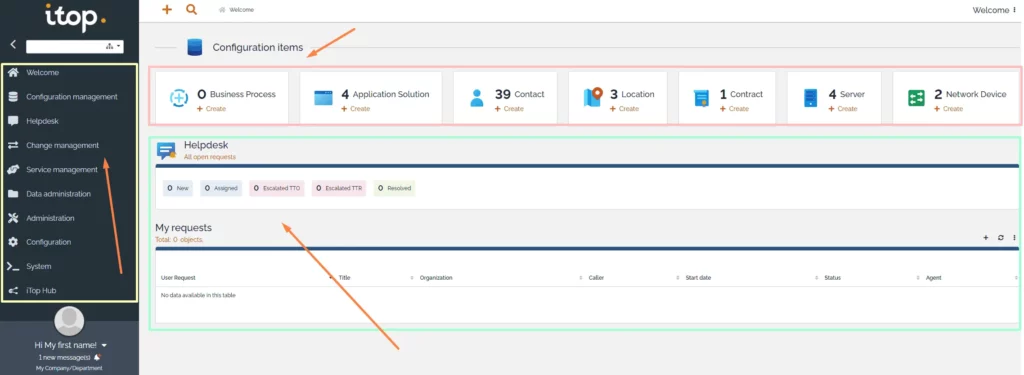
16. Now, it will show the dashboard, on the left pane, you will find all the “iTop modules and settings“, on the top it is showing all its “Configuration Items” and on the down pane it is showing all the “Helpdesk Tickets”
So, we are done itop Installation on Ubuntu 24.04 LTS, For further iTop configuration, you can follow the following video series 👍
Now, we will concentrate on iTop Security..👏
Step #7: iTop Security Measures
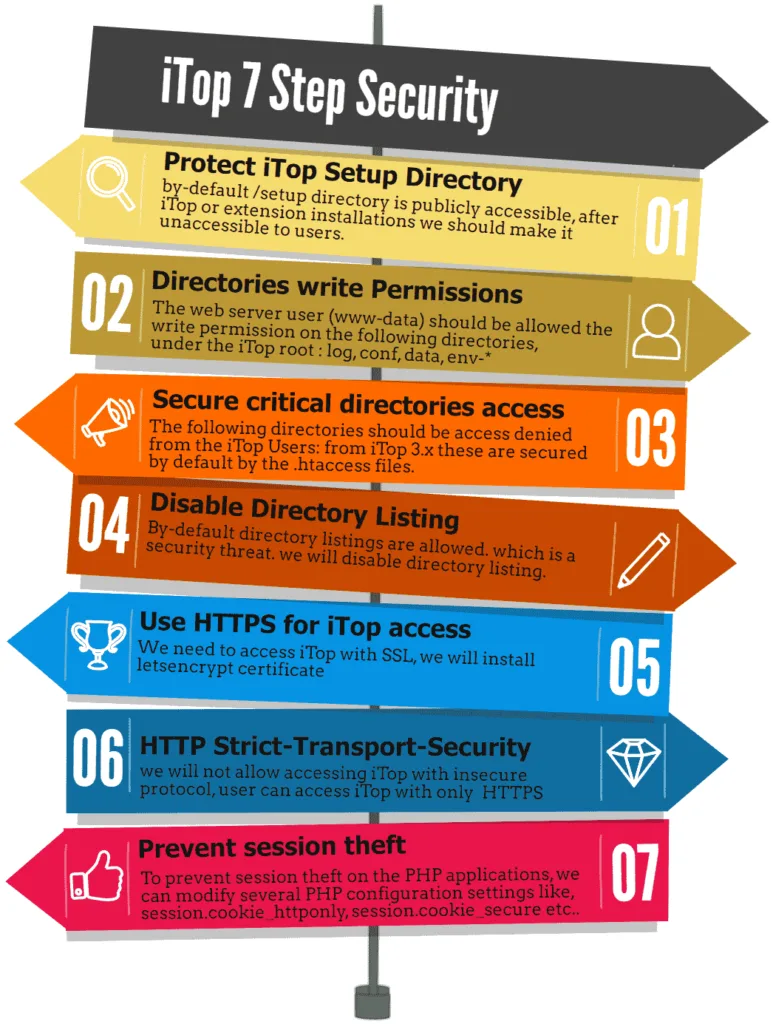
We will perform a secure iTop Installation, there are some security recommendations to consider. in this section, we will work with the following security options below. For a complete list of security checks you can follow the official page:
- Protect iTop Setup Directory
- Directories write Permissions
- Secure critical directories access
- Disable Directory Listing
- Use HTTPS for iTop access
- HTTP Strict-Transport-Security
- Prevent session theft
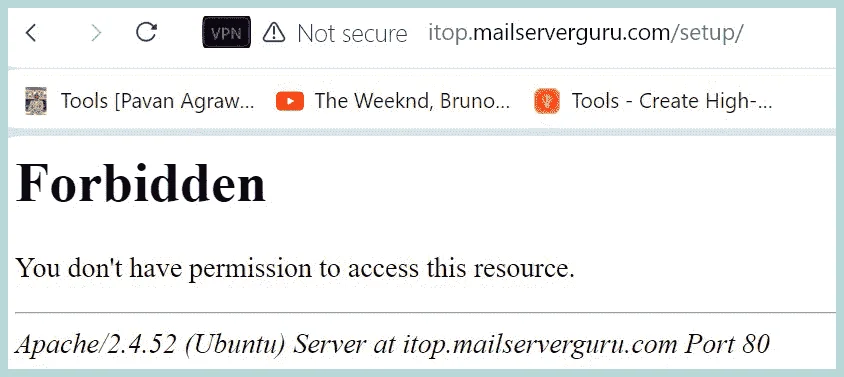
Step #7.1: Protect iTop Setup Directory
iTop /setup is an important directory, each time we install any extensions manually we need to run the setup wizard from here. by-default the directory is publicly accessible, after iTop or extension installations we should make it unaccessible to users. other directories like data, conf, logs contains the .htaccess file but setup missed it. if we need to access the setup later, we can move the .htaccess from there.
- if you hit the directory from the browser http://example.com/setup it will open install wizard.
- Copy the .htaccess file from another directory and put it on the setup.
cp /var/www/html/data/.htaccess /var/www/html/setup/- Now, If you try again the URL http://example.com/setup, it will show Forbidden
Step #7.2: Directories write Permissions
The web server user (www-data) should be allowed the write permission on the following directories, under the iTop root : log, conf, data, env-* , During Installing the extensions if it provides any permission related errors we have to assign the permission to parent directory also.
cd /var/www/html
chown www-data: log conf data env-*
OR,
chown www-data: /var/www/htmlStep #7.3: Secure critical directories access
These directories should be access denied from the iTop Users: from iTop 3.x these are secured by default by the .htaccess files.

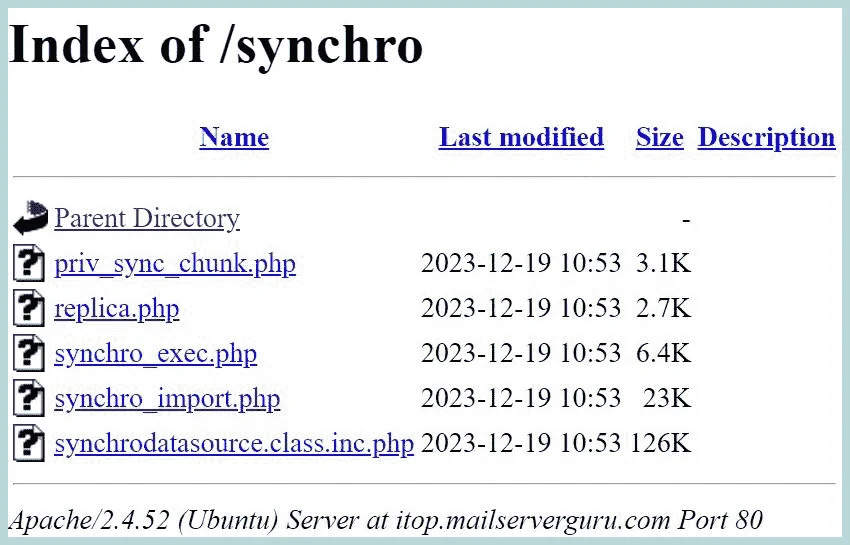
Step #7.4: Disable Directory Listing
By-default directory listings are allowed. which is a security threat. if you try with the URL: http://example.com/synchro from example, you will see the direcvtory content.
- Disable directory listing by providing the “Options -Indexes” on the virtual host configuration.
vi /etc/apache2/sites-enabled/000-default.conf

<Directory /var/www/html>
          Options Indexes FollowSymLinks
          AllowOverride All
          Require all granted
          Options -Indexes
</Directory>

:x //save the file- Restart Apache
systemctl restart apache2.service- Now Check again the URL: http://example.com/synchro, it will show Forbidden.

Step #7.5: Install SSL for iTop
[Note]: Before the SSL Installation, change the ‘app_root_url’ parameter, in the itop configuration file. Please go to Configuration -> General configuration, and change “http” to “https”.
The record will look like: ‘app_root_url’ => ‘https://itop.mailserverguru.com/’,
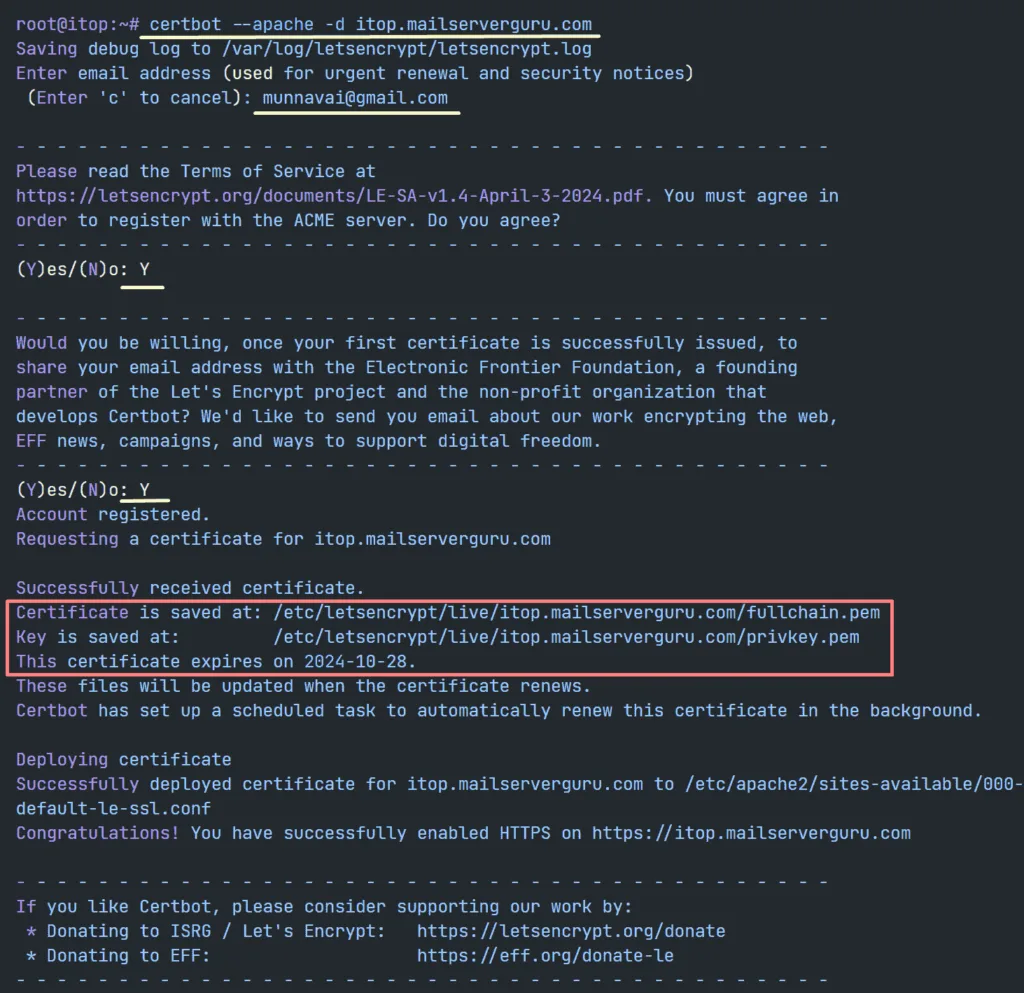
1. We will install LetsEncrypt certificate for iTop, first Install he Certbot tool.
apt install certbot python3-certbot-apache -y2. Requesting a Certificate for iTop.
certbot --apache -d itop.mailserverguru.com- follow the image below for further details on Letsencrypt SSL setup.
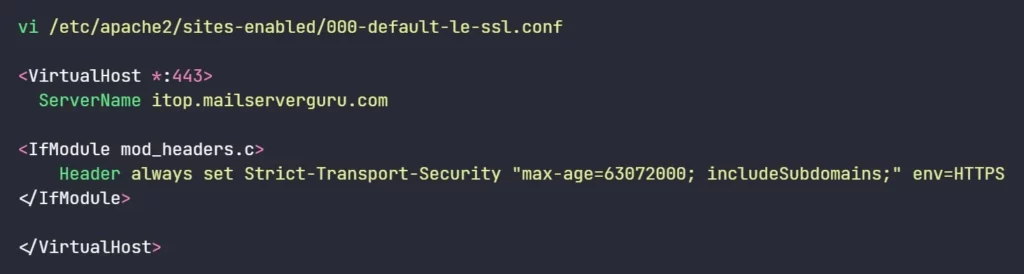
Step #7.6: HTTP Strict-Transport-Security
A good way to force https connection is to send the Strict-Transport-Security HTTP header. This instructs browsers not to allow any connection to the iTop instance using HTTP, prevents man-in-the-middle attacks.
- provide the below code in the virtual host configuration for the default SSL.
<IfModule mod_headers.c>
    Header always set Strict-Transport-Security "max-age=63072000; includeSubdomains;" env=HTTPS
</IfModule>- virtual host configuration will look like the below image.
- Restart Apache
systemctl restart apache2.serviceStep #7.7: Prevent session theft
To prevent session theft on the PHP applications, we should modify several PHP configuration settings iTop recommends.
1. session.cookie_httponly: Prevents JavaScript from accessing the session cookie, reducing the risk of XSS attacks.
2. session.cookie_secure: Ensures cookies are only sent over secure (HTTPS) connections, protecting them from being intercepted. It is only applicable if we use HTTPS.
3. session.cookie_samesite: Protects against CSRF attacks by controlling how cookies are sent with cross-site requests.
4. zend.exception_ignore_args: Prevents sensitive information from being logged during exceptions, enhancing privacy and security.
- Edit /etc/php/8.3/fpm/php.ini and provide these parameters.
session.cookie_httponly = 1
session.cookie_secure = 1
session.cookie_samesite = Lax
zend.exception_ignore_args = On- Now, give a final restart of the Apache and PHP-FPM services.
systemctl restart apache2.service
systemctl restart php8.3-fpm
So, this is it for today !! Our iTop Installation is Done !!
Now It’s Your Turn
I hope this guide will help you to Install iTop successfully. I have tried to show you iTop Installation on Ubuntu 24.04 in step-by-step approach.
If you face any issue or have any doubt on any stage, please let me know on the comment section below.
Thanks !!


Greetings from Chile, the first thing is to say that you have done a great job with the tutorial.
I tell you that I have followed step by step, but at point 10 of Step #4.1 I cannot continue moving forward, despite executing what is indicated, the browser does not show the PHP configuration, but a Hello World! shows it, what could it be?
We appreciate in advance any help you can give me.
It sounds like your PHP configuration is not working properly. can you please check the PHP is workable with or without the PHP-FPM ?
Thanks
Hello from Germany,
First of all, thank you very much for the great work, it helped a lot.
Under 4.1. 10 it says “cd /var/www/html/nextcloud” but I couldn’t do anything with “nextcloud”. Is that a mistake?
All the best,
Stefan
Hi Stefan, Thanks man, that was a pure mistake. I have removed it. you can create the file under /var/www/html/ no isssue, after all test you can remove that file.
Thanks Again !!
Hello Rahman,
i still had a display error at the end because graphics, etc., were still being accessed via http. So, I ran “sudo nano /var/www/html/conf/production/config-itop.php” and added the s to http in the line “‘app_root_url’ => ‘https://example.com/’.” After that, everything was fine.
Regards,
Stefan
Is there a newer video how to configure correctly Mail to ticket automation and sending mail via Gmail?
Hi Jernej, Sorry currently i dont have that. Thanks.
Nice presentation. Top notch document covering way more than the basics.
I have a question though. At Step #7.5: Install SSL for iTop , since I use itop internally so not accessing it from outside, how would the command
certbot –apache -d itop.mailserverguru.com
syntax would change since I am using the ip address of the server to access the web interface?
Thank you in advance.
Hi dmtsou,
If it is an internal server “certbot –apache -d” command will not work, Let’s Encrypt (Certbot) requires public domain validation.
you have to go for the Self-signed SSL, that also work with the IP only.
Thanks👍
Hi again.
I forgot to ask, in case Step #7.5: Install SSL for iTop (so step 7.6 as well) isn t applicable to me (running itop on premises)
which of the four php configuration settings can be set then?
Hi,
Thank you for the good instructions.
I have a problem during the setup where I cannot connect to the database. Phpmyadmin works, but the iTOP setup reports “Error: No connection to the database.” What could be the cause?
Thanks Richard
Hi Richard,
Please check the database server is running,
Thanks.
Hi Rahman,
yes, the database server is running. I get access via phpmyadmin
Thanks
How can logs (e.g. Apache error logs) help diagnose why iTop can’t connect to the database, even when command-line access works fine?
Regard animasi
Thanks for tutorial. I could install my Itop following this steps.
You are most Welcome ❤️