In this guide, we are going to explain in detail, How to Install NextCloud On Ubuntu 24.04 LTS. This is a detailed step by step guide. during the installation, we have focused on increasing the performance and security of the system.
What is Nextcloud?
Nextcloud is a self-hosted collaboration platform designed to enhance productivity through integrated services like Files, Talk, Groupware, and Office. It offers functionality similar to Dropbox, Office 365, or Google Drive when used with office suites like Collabora Online or OnlyOffice.
Nextcloud has four main products. Files provides self-hosted file storage and synchronization. Talk offers private audio/video conferencing and chat. Groupware includes productivity tools like Calendar and Mail, and Office provides an online office suite for collaborative document editing.
Nextcloud can be hosted in the cloud or on-premises, offering flexible deployment options. It allows storing documents on private servers or trusted data centers, ensuring greater control and security.
Below we provided a step by step guide on How to Install NextCloud On Ubuntu 24.04 LTS. We completed in 14 steps. Each steps are mandatory to complete before go to next step.
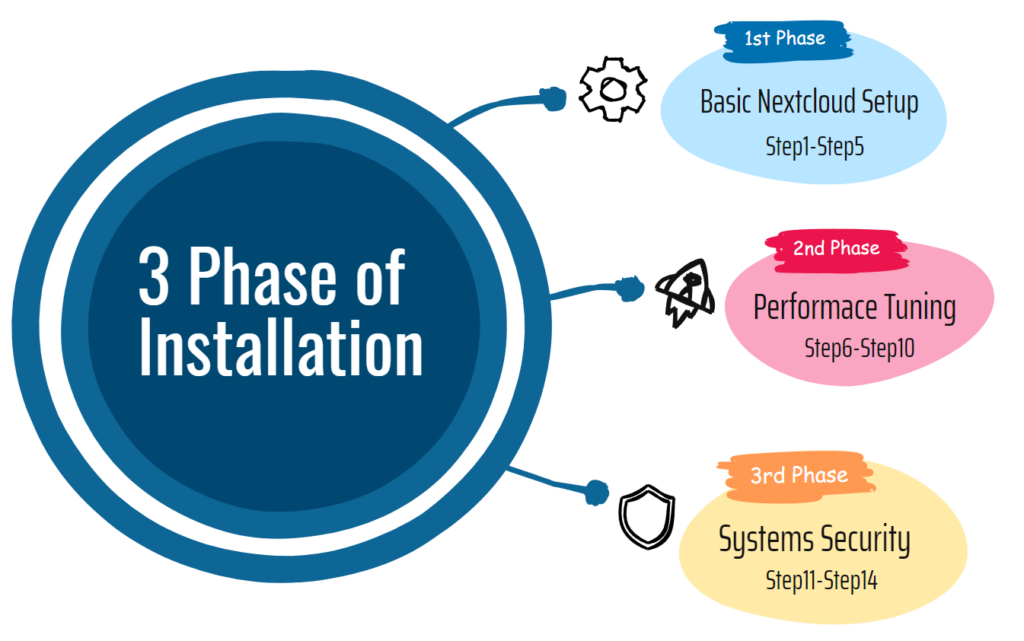
We divided the installation into three main phases. First, we provided the steps for “Basic Nextcloud Setup” then we did the “Performance Tuning“. Finally, we provided steps for “Systems Security“.
| Phase1: | |
| Basic Nextcloud Setup |
|
| In this Phase we Have 5 Steps: |  |
| 1. System Update and Upgrade | |
| 2. Install Apache and PHP Modules | |
| 3. Install MariaDB Database | |
| 4. Prepare Nextcloud archive | |
| 5. Install Nextcloud from CLI | |
Step1: Update and Upgrade the system.
1. Update and Upgrade the Ubuntu Packages
apt update && apt upgrade -y
Step2: Install Apache2 and PHP Modules.
1. install Apache2
apt install apache2 -y
3. Install PHP and other Dependencies
apt install php php-common libapache2-mod-php php-bz2 php-gd php-mysql \
php-curl php-mbstring php-imagick php-zip php-common php-curl php-xml \
php-json php-bcmath php-xml php-intl php-gmp zip unzip wget -y
4. Enable required Apache modules
a2enmod env rewrite dir mime headers setenvif ssl
5. Now, Restart, Enable and Check Apache is Running Properly.
systemctl restart apache2
systemctl enable apache2
6. Apache service should be in running state.
root@nc:~# systemctl status apache2
● apache2.service - The Apache HTTP Server
     Loaded: loaded (/usr/lib/systemd/system/apache2.service;
     enabled; preset: enabled)
     Active: active (running) since Tue 2024-06-18 04:39:09 UTC; 8s ago
       Docs: https://httpd.apache.org/docs/2.4/
   Main PID: 16319 (apache2)
      Tasks: 6 (limit: 2269)
     Memory: 16.1M (peak: 16.3M)
        CPU: 97ms
     CGroup: /system.slice/apache2.service
             ├─16319 /usr/sbin/apache2 -k start
             ├─16326 /usr/sbin/apache2 -k start
6. Check modules are loaded on Apache (Output omitted)
root@nc:~# apache2ctl -M
Loaded Modules:
 core_module (static)
 so_module (static)
 watchdog_module (static)
 http_module (static)
 log_config_module (static)
............
Step3: Install and Configure MariaDB Server
1. Install mariadb-server package
apt install mariadb-server -y
2. Login to MariaDB, Just type the below command, It will drop you to MySQL Prompt.
mysql
root@nc:~# mysql
Welcome to the MariaDB monitor.  Commands end with ; or \g.
Your MariaDB connection id is 1131
Server version: 10.11.7-MariaDB-2ubuntu2 Ubuntu 24.04
Copyright (c) 2000, 2018, Oracle, MariaDB Corporation Ab and others.
Type 'help;' or '\h' for help. Type '\c' to clear the current input statement.
MariaDB [(none)]>
3. Create Database and User for Nextcloud and Provide User Permissions.
CREATE USER 'ncloud'@'localhost' IDENTIFIED BY 'Sh@do5!d';
CREATE DATABASE ncloud CHARACTER SET utf8mb4 COLLATE utf8mb4_general_ci;
GRANT ALL PRIVILEGES ON ncloud.* TO 'ncloud'@'localhost';
FLUSH PRIVILEGES;
quit;
4. Now, restart and enable MariaDB service.
systemctl restart mariadb
systemctl enable mariadb
5. check MariaDB is Running.
root@nc:~# systemctl status mariadb
● mariadb.service - MariaDB 10.11.7 database server
     Loaded: loaded (/usr/lib/systemd/system/mariadb.service;
     enabled; preset: enabled)
     Active: active (running) since Tue 2024-06-18 04:43:21 UTC; 10s ago
       Docs: man:mariadbd(8)
             https://mariadb.com/kb/en/library/systemd/
   Main PID: 17589 (mariadbd)
     Status: "Taking your SQL requests now..."
      Tasks: 12 (limit: 14975)
     Memory: 78.8M (peak: 81.8M)
        CPU: 573ms
     CGroup: /system.slice/mariadb.service
             └─17589 /usr/sbin/mariadbd
Step4: Download Nextcloud, Unzip and Permission
Now download the latest Nextcloud archive. Go to the Nextcloud Download Page Or you can download from this direct link.
1. Download and unzip in the /var/www/html folder
cd /var/www/html
wget https://download.nextcloud.com/server/releases/latest.zip
unzip latest.zip
2. Remove the zip file, which is not necessary now.
rm -rf latest.zip
3. Change the ownership of the nextcloud directory to the HTTP user.
chown -R www-data:www-data /var/www/html/nextcloud/
Step5: Install Nextcloud From Command Line
Now, we will install nextcloud on ubuntu 24.04 LTS from the command line. Configuration will be silent and quicker than going through the web GUI setup. we need to provide database and admin credentials for Command Line installation. you can visit this page to know more about nextcloud CLI installation.
1. Run the below command to install nextcloud (provide your own credentials)
cd /var/www/html/nextcloud
sudo -u www-data php occ  maintenance:install --database \
"mysql" --database-name "ncloud"  --database-user "ncloud" --database-pass \
'Sh@do5!d' --admin-user "admin" --admin-pass "password"
If everything goes well the command will output “Nextcloud was successfully installed”.
2. Nextcloud allows access only from localhost, it could through error “Access through untrusted domain”. we need to allow accessing Nextcloud by using ip or domain name.
vi /var/www/html/nextcloud/config/config.php

  'trusted_domains' =>
  array (
    0 => 'localhost',
    1 => 'nc.mailserverguru.com',   // we Included the Sub Domain
  ),
  .....
:x
3. Configure Apache to load Nextcloud from the /var/www/html/nextcloud folder.
vi /etc/apache2/sites-enabled/000-default.conf

<VirtualHost *:80>
        ServerAdmin webmaster@localhost
        DocumentRoot /var/www/html/nextcloud

        <Directory /var/www/html/nextcloud>
            Options Indexes FollowSymLinks
            AllowOverride All
            Require all granted
	      </Directory>

        ErrorLog ${APACHE_LOG_DIR}/error.log
        CustomLog ${APACHE_LOG_DIR}/access.log combined
</VirtualHost>
4. Now restart Apache
systemctl restart apache2
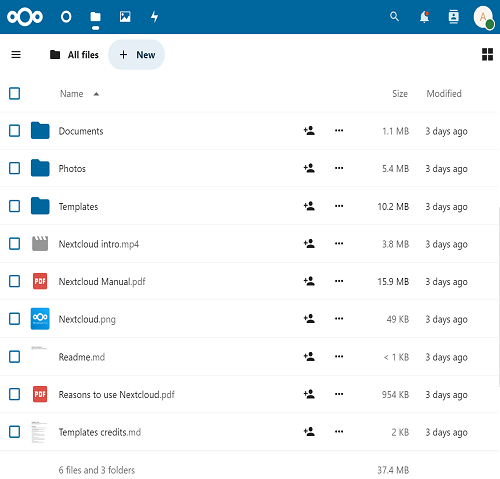
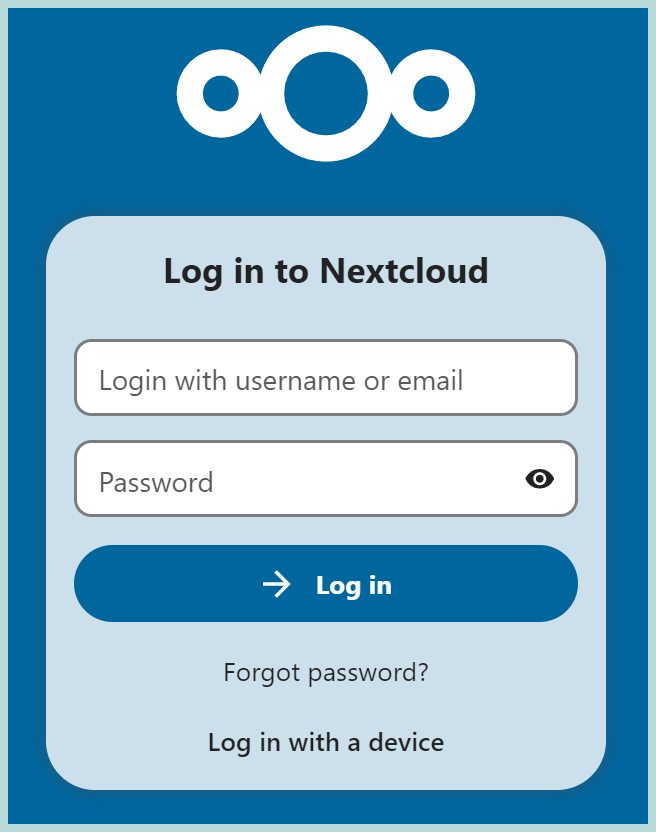
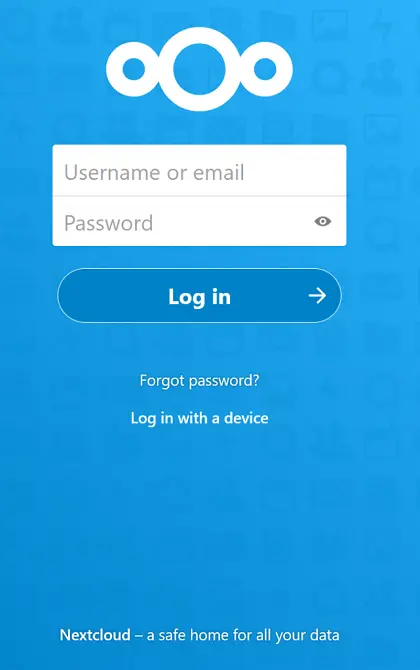
Now, Go to the Browser and type http://[ip or fqdn] of the server, The below Nextcloud login page will appear.
This is it for the 1st phase. We have seen How to install Nextcloud on Ubuntu 24.04 LTS. Now we are going to work on the performance and security.
In the 2nd phase, we will go for the performance tuning, we will install PHP-FPM for PHP files processing, then we will enable various caching system to increase the application performance.
| Phase2: | |
| Performance Tuning |
|
| In this Phase we Have 5 Steps: |  |
| 1. Install PHP-FPM with Apache | |
| 2. Create info.php Page | |
| 3. Enable OPCache & OPCache-JIT | |
| 4. Enable APCu in PHP | |
| 5. Configure Redis Cache | |
Step6: Install and Configure PHP-FPM with Apache
Here we will install PHP-FPM, which is faster than the mpm-prefork module, which is the default method of executing php files on Apache.
1. Install PHP-FPM
apt install php8.3-fpm
2. Check the PHP-FPM is running, its version and Socket is created.
service php8.3-fpm status
php-fpm8.3 -v
ls -la /var/run/php/php8.3-fpm.sock
3. Disable mod_php and prefork module
a2dismod php8.3
a2dismod mpm_prefork
4. Enable PHP-FPM
a2enmod mpm_event proxy_fcgi setenvif
a2enconf php8.3-fpm
5. Restart Apache to reload all the modules and configurations
systemctl restart apache2
Now, for file upload size and performance settings, we need to tweak some php.ini settings listed below in the /etc/php/8.3/fpm/php.ini file. You can assign your own values depending on your environment.
upload_max_filesize = 64M
post_max_size = 96M
memory_limit = 512M
max_execution_time = 600
max_input_vars = 3000
max_input_time = 1000
6. check the current values.
grep -E "upload_max_filesize|post_max_size|memory_limit|max_execution_time|max_input_vars|max_input_time" /etc/php/8.3/fpm/php.ini
7. Instead of manual change, you can execute the below command to change at once. it will save time.
sed -i 's/^upload_max_filesize.*/upload_max_filesize = 64M/; s/^post_max_size.*/post_max_size = 96M/; s/^memory_limit.*/memory_limit = 512M/; s/^max_execution_time.*/max_execution_time = 600/; s/^;max_input_vars.*/max_input_vars = 3000/; s/^max_input_time.*/max_input_time = 1000/' /etc/php/8.3/fpm/php.ini
Now, we need update PHP-FPM pool Configurations at /etc/php/8.3/fpm/pool.d/www.conf, below are some optimum values, but you should assign your own values.
pm.max_children = 64
pm.start_servers = 16
pm.min_spare_servers = 16
pm.max_spare_servers = 32
8. Check current values.
grep -E "pm.max_children|pm.start_servers|pm.min_spare_servers|pm.max_spare_servers" /etc/php/8.3/fpm/pool.d/www.conf
9. Change all the values at once with the below command.
sed -i 's/^pm.max_children = .*/pm.max_children = 64/; s/^pm.start_servers = .*/pm.start_servers = 16/; s/^pm.min_spare_servers = .*/pm.min_spare_servers = 16/; s/^pm.max_spare_servers = .*/pm.max_spare_servers = 32/' /etc/php/8.3/fpm/pool.d/www.conf
10. Now, restart PHP-FPM to apply all the changes.
service php8.3-fpm restart
Now, Insert the below code to apache’s default site configuration file /etc/apache2/sites-enabled/000-default.conf, it will direct apache to handover the php file processing to PHP-FPM.
	<FilesMatch ".php$">
         SetHandler "proxy:unix:/var/run/php/php8.3-fpm.sock|fcgi://localhost/"
	</FilesMatch>
11. After providing the code, apache’s default site configuration will look like the below snippet.
vi /etc/apache2/sites-enabled/000-default.conf

<VirtualHost *:80>

	ServerAdmin webmaster@localhost
	DocumentRoot /var/www/html/nextcloud

	<Directory /var/www/html/nextcloud>
          Options Indexes FollowSymLinks
          AllowOverride All
          Require all granted
	</Directory>

	<FilesMatch ".php$">
          SetHandler "proxy:unix:/var/run/php/php8.3-fpm.sock|fcgi://localhost/"
	</FilesMatch>

	ErrorLog ${APACHE_LOG_DIR}/error.log
	CustomLog ${APACHE_LOG_DIR}/access.log combined

</VirtualHost>
12. Now, Restart Apache to take the change.
systemctl restart apache2
Step7: Create info.php Page for PHP feature check
Create an info.php page, it will show us whether PHP-FPM, OPCache, APCu are enabled with the PHP.
cd /var/www/html/nextcloud

vi info.php
    <?php phpinfo(); ?>
:x
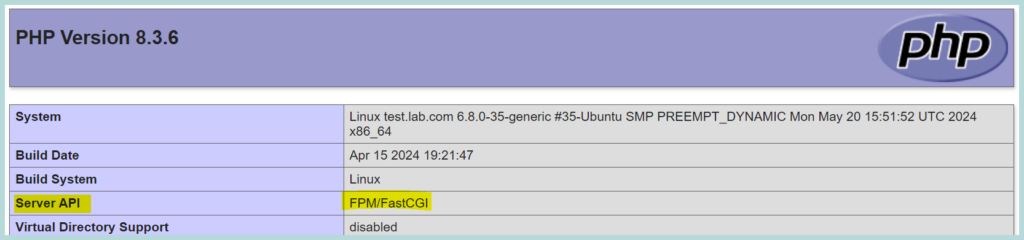
Now, Browse [URL]/info.php. if the PHP-FPM is enabled on the PHP. it will show “Server API FPM/FastCGI”
Step8: Enable OPCache in PHP
Opcache is a caching engine for PHP. It stores precompiled script bytecode in shared memory, so parsing PHP scripts on each request won’t be necessary. It increases PHP file execution and website loading performance. Opcache is enabled by default.
1. Check it is running or not from the [URL]/info.php file previously we created.

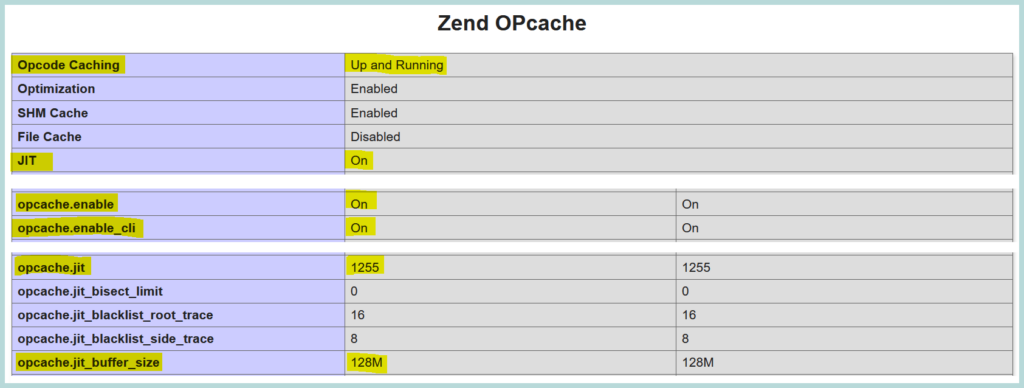
2. Opcache JIT (Just-In-Time) compilation is an important feature. JIT compilation improves PHP performance by compiling code into machine language at runtime, rather than interpreting it each time it’s executed. This can significantly enhance the performance of CPU-intensive tasks. So it will be very effective to enable it to increase nextcloud performance.
vi /etc/php/8.3/fpm/conf.d/10-opcache.ini

zend_extension=opcache.so
opcache.enable_cli=1
opcache.jit=on
opcache.jit = 1255
opcache.jit_buffer_size = 128M

:x
“opcache.enable_cli” this option is not mandatory, but would be very useful if we use nextcloud cli commands or scripts frequently.
3. Restart PHP-FPM to take effect the change.
service php8.3-fpm restart
Now Browse info.php again, it will show all the above features enabled.
Step9: Enable APCu in PHP
APCu is the user data caching. It is a local cache for systems. Nextcloud uses this for memory caching. we need to enable APCu on CLI which is disabled by default which could cause issues with nextcloud’s cron jobs.
1. Install APCu
apt install php8.3-apcu
2. Enable APCu on CLI.
vi /etc/php/8.3/fpm/conf.d/20-apcu.ini

extension=apcu.so
apc.enable_cli=1

:x
3. Now, Restart PHP-FPM and Apache
systemctl restart php8.3-fpm
systemctl restart apache2
Now, Check the [URL]/info.php again, it will show the “APCu support Enabled”

4. Now, Configure Nextcloud to use APCu for memory caching.
vi /var/www/html/nextcloud/config/config.php

'memcache.local' => '\OC\Memcache\APCu',

:x
Step10: Install and Configure Redis Cache
In Nextcloud, Redis is used for local and distributed caching as well as transactional file locking. we used APCu for Local Caching which is faster than Redis. We will use Redis for File locking. Nextcloud’s Transactional File Locking mechanism locks files to avoid file corruption during normal operation.
1. Install Redis Server and Redis php extension
apt install redis-server php-redis -y
2. Start and Enable the Redis service.
systemctl start redis-server
systemctl enable redis-server
2. Configure Redis to use Unix Socket than ports
vi /etc/redis/redis.conf

port 0
unixsocket /var/run/redis/redis.sock
unixsocketperm 770

:x
3. Add Apache user to the Redis group
usermod -a -G redis www-data
4. Configure Nextcloud for using Redis for File Locking
vi /var/www/html/nextcloud/config/config.php

'filelocking.enabled' => 'true',
'memcache.locking' => '\OC\Memcache\Redis',
'redis' => [
     'host'     => '/var/run/redis/redis.sock',
     'port'     => 0,
     'dbindex'  => 0,
     'password' => '',
     'timeout'  => 1.5,
],

:x
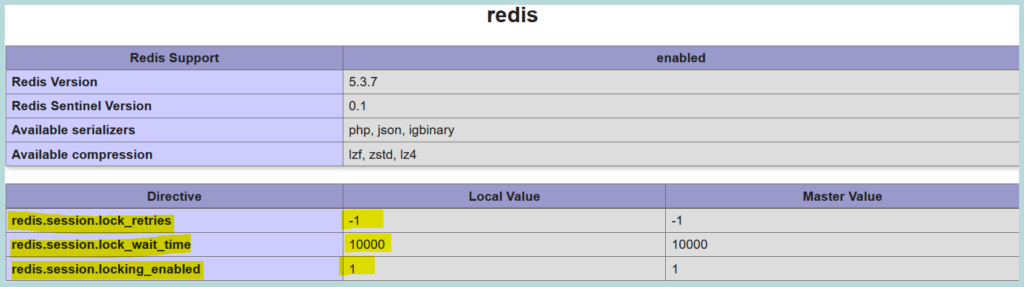
5. Enable Redis session locking in PHP
vi /etc/php/8.3/fpm/php.ini

redis.session.locking_enabled=1
redis.session.lock_retries=-1
redis.session.lock_wait_time=10000

:x
6. Restart Redis, PHP-FPM and Apache
systemctl restart redis-server
systemctl restart php8.3-fpm
systemctl restart apache2
7. You can check the features are enabled on PHP
We can check Redis use, (by enabling the Redis port in the Redis configuration) by running the command “redis-cli MONITOR“, during Nextcloud loading it will show live data on the screen.
Now, that we have finished Performance improvement steps. We are going to work for the Security, First of all, we will install an SSL certificate for Nextcloud.
| Phase3: | |
| Systems Security |
|
| In this Phase we Have 4 Steps: |  |
| 1. Install SSL and enable HTTP2 |
|
| 2. Strict Transport Security |
|
| 3. Enable Pretty URL’s |
|
| 4. Protection with Firewall |
|
Step11: Install SSL and Enable HTTP2
1. We will install the LetsEncrypt certificate, so, first, we need the Certbot tools.
apt install certbot python3-certbot-apache -y
2. with the Certbot tool, let’s request a Certificate for our domain.
certbot --apache -d nc.mailserverguru.com

Saving debug log to /var/log/letsencrypt/letsencrypt.log
Enter email address (used for urgent renewal and security notices)
(Enter 'c' to cancel): [email protected] // Provide Email Address.

- - - - - - - - - - - - - - - - - - - - - - - - - - - - - - - - - - - - - - - -
Please read the Terms of Service at
https://letsencrypt.org/documents/LE-SA-v1.4-April-3-2024.pdf. You must agree in
order to register with the ACME server. Do you agree?
- - - - - - - - - - - - - - - - - - - - - - - - - - - - - - - - - - - - - - - -
(Y)es/(N)o: Y   // Input Y here

- - - - - - - - - - - - - - - - - - - - - - - - - - - - - - - - - - - - - - - -
Would you be willing, once your first certificate is successfully issued, to
share your email address with the Electronic Frontier Foundation, a founding
partner of the Let's Encrypt project and the non-profit organization that
develops Certbot? We'd like to send you email about our work encrypting the web,
EFF news, campaigns, and ways to support digital freedom.
- - - - - - - - - - - - - - - - - - - - - - - - - - - - - - - - - - - - - - - -
(Y)es/(N)o: Y  // Input Y here
Account registered.
Requesting a certificate for nc.mailserverguru.com

Successfully received certificate.
Certificate is saved at: /etc/letsencrypt/live/nc.mailserverguru.com/fullchain.pem
Key is saved at:         /etc/letsencrypt/live/nc.mailserverguru.com/privkey.pem
This certificate expires on 2024-09-16.
These files will be updated when the certificate renews.
Certbot has set up a scheduled task to automatically renew this certificate in the background.

Deploying certificate
Successfully deployed certificate for nc.mailserverguru.com to /etc/apache2/sites-available/000-default-le-ssl.conf
Congratulations! You have successfully enabled HTTPS on https://nc.mailserverguru.com

- - - - - - - - - - - - - - - - - - - - - - - - - - - - - - - - - - - - - - - -
If you like Certbot, please consider supporting our work by:
 * Donating to ISRG / Let's Encrypt:   https://letsencrypt.org/donate
 * Donating to EFF:                    https://eff.org/donate-le
- - - - - - - - - - - - - - - - - - - - - - - - - - - - - - - - - - - - - - - -
3. Enable apache HTTP2 module
a2enmod http2
4. Configure default SSL site for the http2 protocols
vi /etc/apache2/sites-enabled/000-default-le-ssl.conf

<VirtualHost *:443>

        Protocols h2 http/1.1

        ServerAdmin webmaster@localhost
        DocumentRoot /var/www/html/nextcloud
  ......
:x
5. Now restart Apache to enable the HTTP2 Protocol
systemctl restart apache2
4. Test the http2 protocol, by sending an http2 request to the web server.
curl -I --http2 -s https://nc.mailserverguru.com/ | grep HTTP

HTTP/2 200
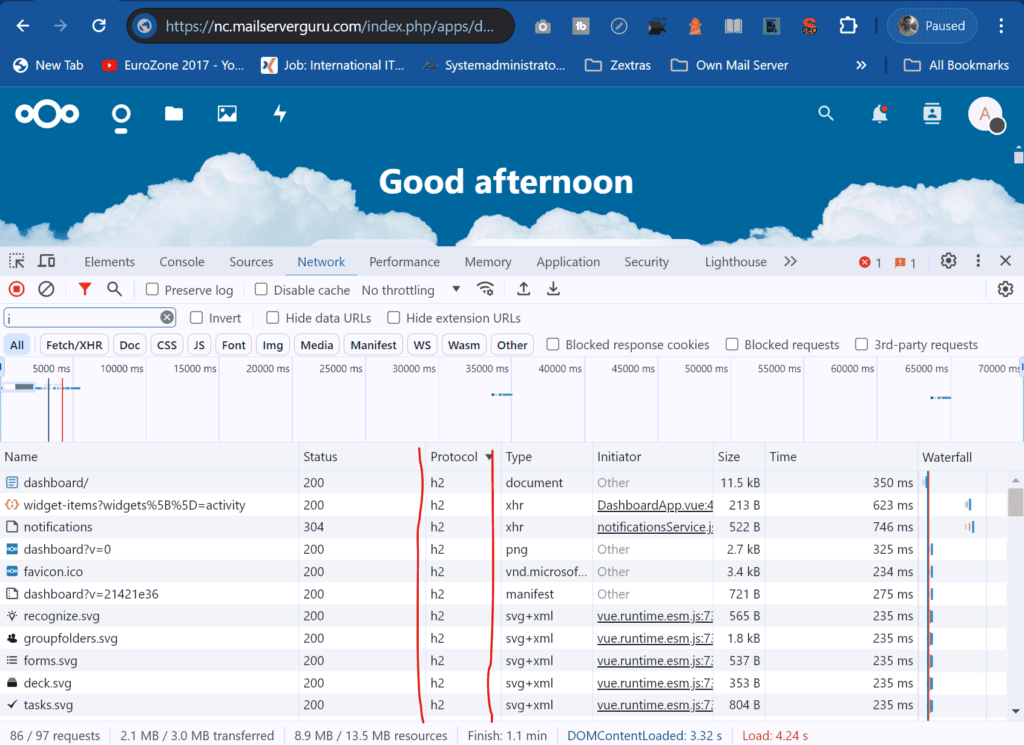
Or, we can Inspect the Browser while accessing Nextcloud URL, we can easily see the protocol column from the Network tab, and it will show h2 as the protocol which is http2.
Step12: Enable Strict Transport Security
HTTP Strict Transport Security, which instructs browsers not to allow any connection to the Nextcloud instance using HTTP, prevents man-in-the-middle attacks. provide the below code in the virtual host configuration for the default SSL.
<IfModule mod_headers.c>
    Header always set Strict-Transport-Security "max-age=15552000; includeSubDomains"
</IfModule>
vi /etc/apache2/sites-enabled/000-default-le-ssl.conf

<VirtualHost *:443>
  ServerName nc.mailserverguru.com

<IfModule mod_headers.c>
    Header always set Strict-Transport-Security "max-age=15552000; includeSubDomains"
</IfModule>

</VirtualHost>
Step13: Enable Pretty URL’s
Pretty URLs remove the "index.php” part in all Nextcloud URLs. It will make URLs shorter and prettier.
vi /var/www/html/nextcloud/config/config.php

'htaccess.RewriteBase' => '/',

:x
This command will update the .htaccess file for the redirection
sudo -u www-data php --define apc.enable_cli=1 /var/www/html/nextcloud/occ maintenance:update:htaccess
Step14: Access Protection with Firewall.
No server can maintain good security without an active firewall policy. after install and configure nextcloud, we have to allow traffic only to specific ports, rest of the ports should be close to the world. if we add more nextcloud apps later, we might need to open new ports to the firewall later.
1. execute the following code’s for the basic Iptables firewall setup.
#!/bin/bash

# Flush all existing rules
iptables -F
iptables -X
iptables -t nat -F
iptables -t nat -X
iptables -t mangle -F
iptables -t mangle -X

# Allow loopback traffic
iptables -A INPUT -i lo -j ACCEPT
iptables -A OUTPUT -o lo -j ACCEPT

# Allow established and related incoming traffic
iptables -A INPUT -m conntrack --ctstate ESTABLISHED,RELATED -j ACCEPT

# Allow all outgoing traffic
iptables -A OUTPUT -j ACCEPT

# Allow incoming traffic on port 22 (SSH)
iptables -A INPUT -p tcp --dport 22 -j ACCEPT

# Allow incoming traffic on port 80 (HTTP)
iptables -A INPUT -p tcp --dport 80 -j ACCEPT

# Allow incoming traffic on port 443 (HTTPS)
iptables -A INPUT -p tcp --dport 443 -j ACCEPT

# Allow ICMP (ping)
iptables -A INPUT -p icmp -j ACCEPT

# Apply security hardening

# Protect against SYN flood attacks
iptables -A INPUT -p tcp ! --syn -m conntrack --ctstate NEW -j DROP
iptables -A INPUT -p tcp --tcp-flags ALL NONE -j DROP
iptables -A INPUT -p tcp --tcp-flags SYN,FIN SYN,FIN -j DROP
iptables -A INPUT -p tcp --tcp-flags SYN,RST SYN,RST -j DROP

# Protect against ping flood (limit to 1 ping per second with burst of 3)
iptables -A INPUT -p icmp --icmp-type echo-request -m limit --limit 1/s --limit-burst 3 -j ACCEPT

# Protect against IP spoofing
iptables -A INPUT -s 10.0.0.0/8 -j DROP
iptables -A INPUT -s 172.16.0.0/12 -j DROP
iptables -A INPUT -s 192.168.0.0/16 -j DROP
iptables -A INPUT -s 127.0.0.0/8 -j DROP
iptables -A INPUT -s 224.0.0.0/4 -j DROP
iptables -A INPUT -s 240.0.0.0/5 -j DROP
iptables -A INPUT -s 0.0.0.0/8 -j DROP
iptables -A INPUT -s 169.254.0.0/16 -j DROP

# Log dropped packets (optional)
iptables -A INPUT -m limit --limit 5/min -j LOG --log-prefix "iptables denied: " --log-level 7

# Drop all other inbound traffic
iptables -A INPUT -j DROP

# End of script
2. Apply the Iptables Rules through script, follow the below steps.
vi nextcloud_iptables.sh

# copy Iptables Rules from above and Paste here.

:x

# Make the script executable
chmod +x nextcloud_iptables.sh

# Run the script
./nextcloud_iptables.sh
3. Save the rules permanently. It will reload across reboot.
apt install iptables-persistent netfilter-persistent -y

systemctl enable netfilter-persistent
systemctl start netfilter-persistent
4. If you Update the Rules, you have to save it, so that it can be reloaded across reboot
iptables-save > /etc/iptables/rules.v4
[Note]: Regarding the SSH port, you should only allow your specific node or network to remote access to your nextcloud server.
So, this is it..
We have done our Complete Guide on How to Install NextCloud On Ubuntu 24.04 LTS.
Enjoy !!
In this guide, we are going to explain how to install nextcloud on ubuntu 24.04 LTS.
Nextcloud is an open-source file hosting app that allow users to store and manage their documents, pictures and videos to their personal server or trusted data centers. Users has full control over their data and can provide any security measures they need.
Nextcloud is a private alternative solution to Dropbox and Google Drive, it has integrated office suite like Collabora Online or OnlyOffice, and application like email, contacts, calendar, chat, map, drawing board and many other 3rd party application with API support.
In this blog post, we will describe in few obvious steps how to install nextcloud on ubuntu 24.04. later on we can integrate other applications from the nextcloud dashboard.
Step1: Update and Upgrade the System
Before nextcloud installation we better update all the system packages and upgrade the system to the latest. to update and upgrade with a single shot, please execute the following command.
apt update -y && apt upgrade -y
Step2: Install Apache and MySQL Server
Nextcloud is an web app with a database back-end, so we need a web server and a database server for the installation, we are installing apache as webserver and MariaDB as the database server.
Apache Server Installation:
apt install apache2
Start and Enable the Apache Service:
systemctl start apache2
systemctl enable apache2
See the current status of Apache server with the below command, Apache server must be running.
systemctl status apache2root@nc:~# systemctl status apache2
● apache2.service - The Apache HTTP Server
Loaded: loaded (/usr/lib/systemd/system/apache2.service; enabled;
preset: enabled)
Active: active (running) since Sat 2024-05-25 02:42:34 UTC; 1h 36min ago
Docs: https://httpd.apache.org/docs/2.4/
Process: 21813 ExecStart=/usr/sbin/apachectl start (code=exited,
status=0/SUCCESS)
Main PID: 21817 (apache2)
Tasks: 11 (limit: 4556)
Memory: 871.4M (peak: 993.6M)
CPU: 1min 2.942s
CGroup: /system.slice/apache2.service
├─21817 /usr/sbin/apache2 -k start
├─21821 /usr/sbin/apache2 -k start
├─21823 /usr/sbin/apache2 -k start
├─21865 /usr/sbin/apache2 -k start
├─21866 /usr/sbin/apache2 -k start
├─21867 /usr/sbin/apache2 -k start
├─21868 /usr/sbin/apache2 -k start
├─21893 /usr/sbin/apache2 -k start
├─21969 /usr/sbin/apache2 -k start
├─21973 /usr/sbin/apache2 -k start
└─21974 /usr/sbin/apache2 -k start
The above command output confirms the Apache in Running state.
MariaDB Server Installation:
apt install mariadb-server
Start and Enable MariaDB Service
systemctl start mariadb
systemctl enable mariadb
Check the current status of MariaDB server with the below command, MariaDB service must be running.
systemctl status mariadbroot@nc:~# systemctl status mariadb
● mariadb.service - MariaDB 10.11.7 database server
Loaded: loaded (/usr/lib/systemd/system/mariadb.service; enabled;
preset: enabled)
Active: active (running) since Sat 2024-05-25 02:31:18 UTC; 2h 33min ago
Docs: man:mariadbd(8)
https://mariadb.com/kb/en/library/systemd/
Main PID: 8820 (mariadbd)
Status: "Taking your SQL requests now..."
Tasks: 17 (limit: 30074)
Memory: 124.6M (peak: 125.6M)
CPU: 10.370s
CGroup: /system.slice/mariadb.service
└─8820 /usr/sbin/mariadbd
The above command output confirms the MariaDB in Running state.
Step3: Install PHP and Supportive Modules
Nextcloud written in PHP and JavaScript, so we needed to install PHP and all the required module for its functionalities to work properly.
Install PHP and required Modules:
apt install php php-common libapache2-mod-php php-bz2 php-gd php-mysql \
php-curl php-mbstring php-imagick php-zip php-common php-curl php-xml \
php-json php-bcmath php-xml php-intl php-gmp zip unzip wget
Enable PHP Modules on Apache.
a2enmod env rewrite dir mime headers setenvif ssl
Now, Restart Apache to load all the installed PHP Modules
systemctl restart apache2
Check modules are loaded on Apache.
root@nc:~# apache2ctl -M
Loaded Modules:
 core_module (static)
 so_module (static)
 watchdog_module (static)
 http_module (static)
 log_config_module (static)
 logio_module (static)
 version_module (static)
...........
Step4: Create Nextcloud database and user
In this step we will create database and database user for Nextcloud.
Login to MySQL Prompt, Just type the below command, it will open an interactive MariaDB Prompt to create user and database.
mysqlroot@nc:~# mysql
Welcome to the MariaDB monitor. Commands end with ; or \g.
Your MariaDB connection id is 1131
Server version: 10.11.7-MariaDB-2ubuntu2 Ubuntu 24.04
Copyright (c) 2000, 2018, Oracle, MariaDB Corporation Ab and others.
Type 'help;' or '\h' for help. Type '\c' to clear the current input statement.
MariaDB [(none)]>Now, Create MySQL Database and User for Nextcloud and Provide database Permission to the User. Copy all the SQL Commands and execute one by one on the the prompt.
MariaDB [(none)]> CREATE USER 'nextcloud'@'localhost' IDENTIFIED BY 'passw@rd';
MariaDB [(none)]> CREATE DATABASE IF NOT EXISTS nextcloud CHARACTER SET utf8mb4 COLLATE utf8mb4_general_ci;
MariaDB [(none)]> GRANT ALL PRIVILEGES ON nextcloud.* TO 'nextcloud'@'localhost';
MariaDB [(none)]> FLUSH PRIVILEGES;
quit;
Step5: Unzip Nextcloud Archive and Configure
Now, download the latest Nextcloud archive file, Go to the Nextcloud Download Page. Or you can download from this direct link.
Download and unzip in the web root (/var/www/html) folder:
cd /var/www/htmlRemove the default index.html file from the webroot:
rm index.htmlDownload and Unzip the Nextcloud Archive:
wget https://download.nextcloud.com/server/releases/latest.zip
unzip latest.zip
Move all Nextcloud content to the web root (/var/www/html) folder:
cd /var/www/html/nextcloud
mv * /var/www/html/
Remove the Empty nextcloud Folder
rmdir /var/www/html/nextcloud
Change the ownership of the Nextcloud content directory to the HTTP user.
chown -R www-data:www-data /var/www/html
Step6: Finish Nextcloud Installation
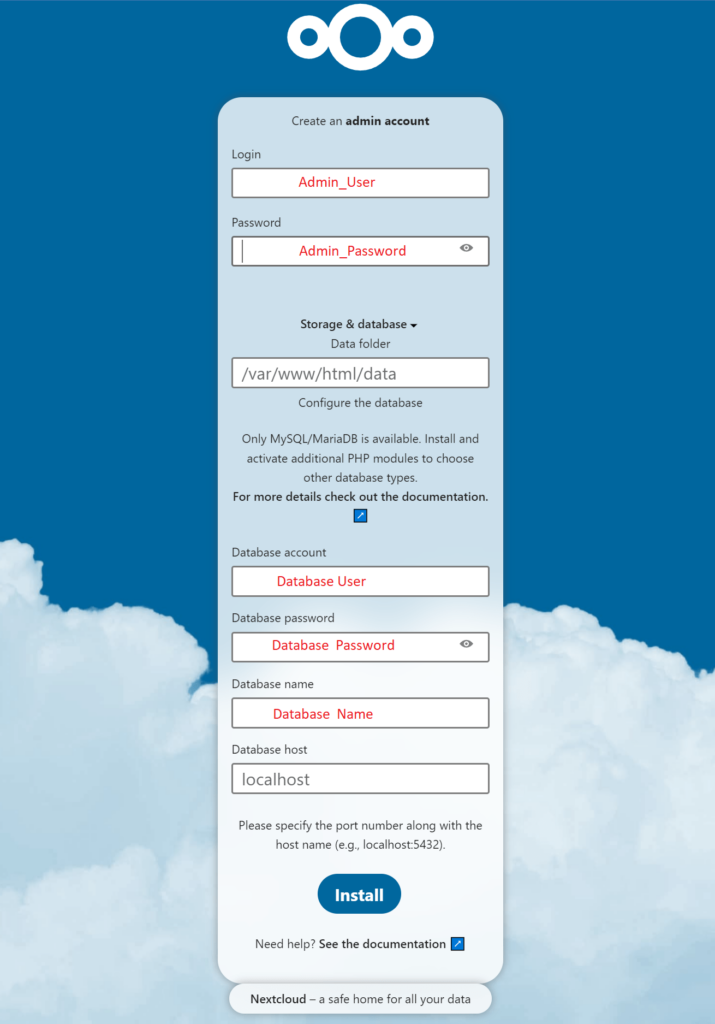
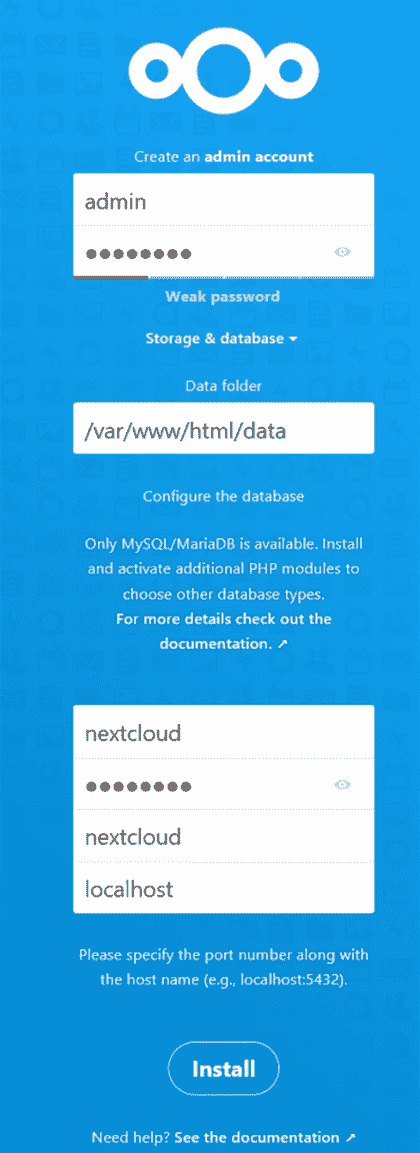
Now, Go to the Browser and type http:// [ ip or fqdn ] of the server, The below Nextcloud install page will appear.
On the page, we need to provide information for
1. Nextcloud admin Username and Password
2. Database Credentials (db name, db user and db Password)
3. After Providing all the information, “Click Install” Button
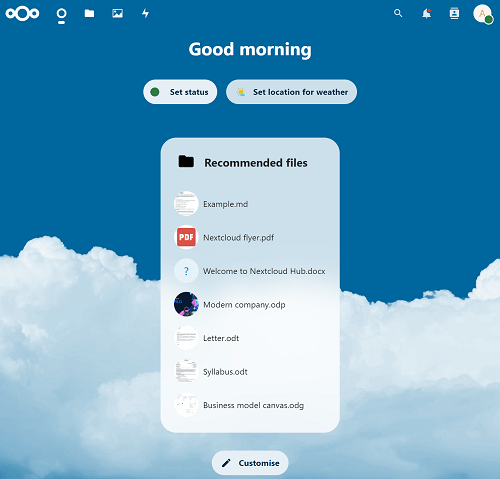
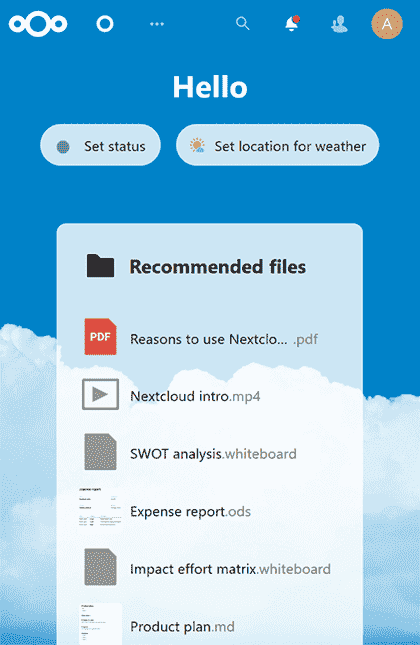
After Nextcloud Installation finishes, It will show the recommended apps page. Click on the Install recommend apps button.

it will take 1/2 minutes to install all the recommended apps, then it will show up the admin dashboard.
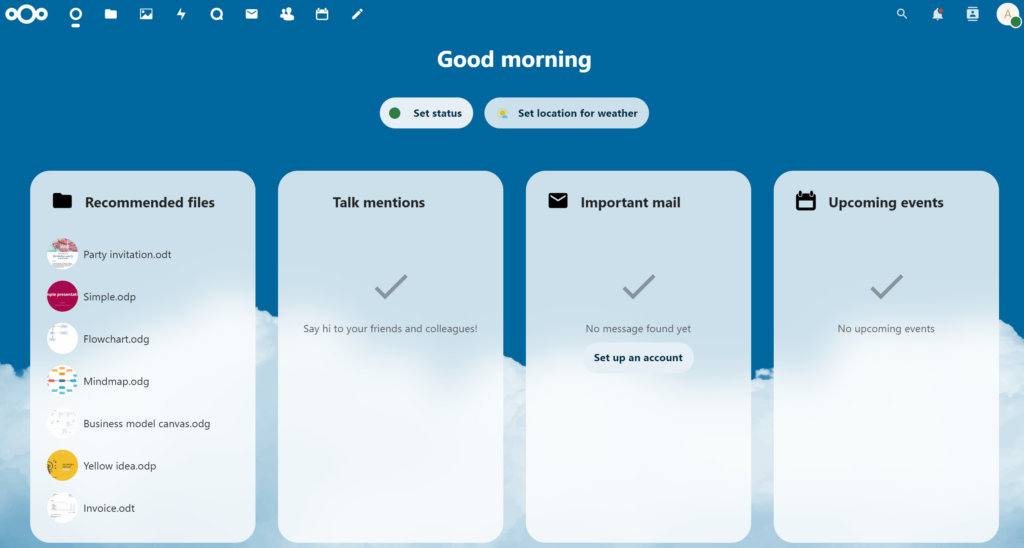
with the admin dashboard shows up, our Nextcloud Installation on Ubuntu 24.04 finishes successfully.
Thanks !!
In this guide, we’ll demonstrate how to install NextCloud from Command line on Ubuntu 22.04. Rather than using the web-based setup, We will run a few commands to finish the initial configurations. So, we will not perform the entire installation manually.
There are various method of Nextcloud Installation. Command line Installation is the easiest. First, we will prepare the server environment for regular nextcloud setup. Secondly, instead of the web based setup, we will completely install and configure Nextcloud on Ubuntu 22.04 using the command line.
Nextcloud CLI installation method is very useful because we can perform full automatic installation with any automation system. Below, we mentioned the steps for the Nextcloud Command line Installation.
Step1: Install PHP, Apache and MariaDB Server
1. Update and Upgrade the Ubuntu Packages
apt update && apt upgrade
2. install Apache and MySQL Server
apt install apache2 mariadb-server
3. Install PHP and other Dependencies and Restart Apache
apt install libapache2-mod-php php-bz2 php-gd php-mysql php-curl \
php-mbstring php-imagick php-zip php-ctype php-curl php-dom php-json \
php-posix php-bcmath php-xml php-intl php-gmp zip unzip wget
4. Enable required Apache modules and restart Apache:
a2enmod rewrite dir mime env headers
systemctl restart apache2
Step2. Configure MariaDB Server
1. Login to MySQL Prompt, Just type
mysql
2. Create MySQL Database and User for Nextcloud and Provide Permissions.
CREATE USER 'nextcloud'@'localhost' IDENTIFIED BY 'passw@rd';
CREATE DATABASE IF NOT EXISTS nextcloud CHARACTER SET utf8mb4 COLLATE utf8mb4_general_ci;
GRANT ALL PRIVILEGES ON nextcloud.* TO 'nextcloud'@'localhost';
FLUSH PRIVILEGES;
quit;
Step3. Download and Prepare Nextcloud Package
Now download the latest Nextcloud archive file, Go to the Nextcloud Download Page. Or you can download from this direct link.
1. Download and unzip at the web root (/var/www/html) folder
cd /var/www/html
wget https://download.nextcloud.com/server/releases/latest.zip
unzip latest.zip
2. Move all nextcloud content to the web root (/var/www/html) folder
cd /var/www/html/nextcloud
mv * .* ../
3. Remove empty nextcloud directory
rmdir /var/www/html/nextcloud
4. Change the ownership of the nextcloud content directory to the HTTP user.
chown -R www-data:www-data /var/www/htmlStep4: Run the Nextcloud installation CLI Command
This CLI command will take all the installation parameters like the database and admin credentials to run the installation and configure on the background.
cd /var/www/html
sudo -u www-data php occ  maintenance:install --database \
"mysql" --database-name "nextcloud"  --database-user "nextcloud" --database-pass \
"passw@rd" --admin-user "admin" --admin-pass "admin123"
If everything goes well the command will output “Nextcloud was successfully installed”.
nextcloud allowed access only from localhost, it could through error “Access through untrusted domain”. we need to allow accessing nextcloud by using our ip or domain name.
vi /var/www/html/config/config.php
<?php
$CONFIG = array (
'passwordsalt' => 'VAXFa5LsahAWHK/CMPHC3QkTsnqK80',
'secret' => 'ZWTuZMLpKVizET85i/NkcwYCPUQyjB/6ZjEYGdVgJeDhNXzR',
'trusted_domains' =>
array (
0 => 'localhost',
1 => 'nc.mailserverguru.com', // we added this line
),
'datadirectory' => '/var/www/html/data',
'dbtype' => 'mysql',
.....
:x
// Now, save the file and restart apache2
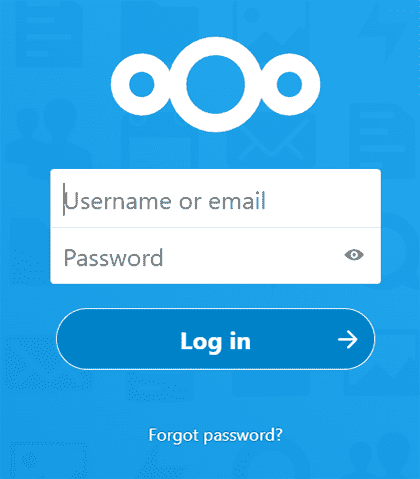
systemctl restart apache2Now, Go to the Browser and type http:// [ ip or fqdn ] of the server, as the configuration is completed command line, the Login page will appear.
Thanks !!
In this tutorial, we are going to explain in details how to install nextcloud on Ubuntu 22.04.
Nextcloud is a file hosting system that allows us to store our content like documents, pictures, videos, etc, and share them with others.
Instead of relying on external service providers for our personal and business documents, Nextcloud gives us the freedom to store them on our servers or in trusted data centers.
it’s a self-managed centralized document and file management system. It is Open-Source hence enabling us to use and adapt the application as we need. We have full control over the application. So we can provide our security measures to secure our contents.
Nextcloud installation is easy and straightforward, there are many steps to enhance the functionalities of nextcloud, below, we provided the very basic steps to quickly install Nextcloud on Ubuntu 22.04 LTS.
Step1: Install PHP and MySQL packages
1. Update and Upgrade the Ubuntu Packages
apt update && apt upgrade
2. install Apache and MySQL Server
apt install apache2 mariadb-server
3. Install PHP and other Dependencies and Restart Apache
apt install libapache2-mod-php php-bz2 php-gd php-mysql php-curl \
php-mbstring php-imagick php-zip php-ctype php-curl php-dom \
php-json php-posix php-bcmath php-xml php-intl php-gmp zip unzip wget
4. Enable required Apache modules and restart Apache:
a2enmod rewrite dir mime env headers
systemctl restart apache2
Step2: Configure MySQL Server
1. Login to MySQL Prompt, Just type
mysql
2. Create MySQL Database and User for Nextcloud and Provide Permissions.
CREATE USER 'nextcloud'@'localhost' IDENTIFIED BY 'passw@rd';
CREATE DATABASE IF NOT EXISTS nextcloud CHARACTER SET utf8mb4 COLLATE utf8mb4_general_ci;
GRANT ALL PRIVILEGES ON nextcloud.* TO 'nextcloud'@'localhost';
FLUSH PRIVILEGES;
quit;
Step3: Download and Install Nextcloud
Now download the latest Nextcloud archive file, Go to the Nextcloud Download Page. Or you can download from this direct link.
1. Download and unzip at the web root (/var/www/html) folder
cd /var/www/html
rm index.html
wget https://download.nextcloud.com/server/releases/latest.zip
unzip latest.zip
2. Move all nextcloud content to the web root (/var/www/html) folder
cd /var/www/html/nextcloud
mv * .* ../
3. Remove the empty nextcloud directory
rmdir /var/www/html/nextcloud
4. Change the ownership of the Nextcloud content directory to the HTTP user.
chown -R www-data:www-data /var/www/htmlStep4: Finalize Setup from the Browser
Now, Go to the Browser and type http:// [ ip or fqdn ] of the server, The below Nextcloud install page will appear. On the page, we need to provide information for
1. Nextcloud admin username & password
2. Database Credentials (db name, db user and db Password)
After Providing all the information click the Install button. it will install Nextcloud in a minute and provide the recommended app installation page, we can safely cancel the prompt for now.

Our installation and Initial Setup are complete so Next, the Nextcloud Dashboard will appear.
OK, this is it.
This is the fastest way to install Nextcloud on Ubuntu 22.04, after installation we should take care of the Nextcloud performance and security issues.
Thanks !!
In this tutorial, we are going to see How to Install NextCloud On Ubuntu 22.04 LTS. This will be a detailed setup, we have provided steps to increase the performance of Nextcloud and apply all the security measures needed to secure the server.
Nextcloud is a file hosting system that allows us to store our content like documents, pictures, videos, etc, and share it with others.
Instead of relying on external service providers for our personal and business documents, Nextcloud gives us the freedom to store them on our servers or in trusted data centers. it’s a self-managed centralized document and file management system.
Below we provided a detailed step-by-step guidelines on how to install Nextcloud on Ubuntu 22.04 LTS. To maintain high performance and security, we have added necessary steps to add more features on the system. Each steps are highly recommended to setup a production grade Nextcloud environement.
Step1: Install Required Packages
1. Update and Upgrade the Ubuntu Packages
apt update && apt upgrade
2. install Apache and MySQL Server
apt install apache2 mariadb-server
3. Install PHP and other Dependencies and Restart Apache
apt install libapache2-mod-php php-bz2 php-gd php-mysql php-curl php-zip \
php-mbstring php-imagick php-ctype php-curl php-dom php-json php-posix \
php-bcmath php-xml php-intl php-gmp zip unzip wget
4. Enable required Apache modules and restart Apache:
a2enmod rewrite dir mime env headers
systemctl restart apache2
Step2. Configure MySQL Server
1. Login to MySQL Prompt, Just type
mysql
2. Create MySQL Database and User for Nextcloud and Provide Permissions.
CREATE USER 'nextcloud'@'localhost' IDENTIFIED BY 'passw@rd';
CREATE DATABASE IF NOT EXISTS nextcloud CHARACTER SET utf8mb4 COLLATE utf8mb4_general_ci;
GRANT ALL PRIVILEGES ON nextcloud.* TO 'nextcloud'@'localhost';
FLUSH PRIVILEGES;
quit;
Step3. Download, Extract, and Apply Permissions.
Now download the latest Nextcloud archive file, Go to the Nextcloud Download Page. Or you can download from direct link: https://download.nextcloud.com/server/releases/latest.zip
1. Download and unzip at the /var/www folder
cd /var/www/
wget https://download.nextcloud.com/server/releases/latest.zip
unzip latest.zip
2. Remove the zip file, which is not necessary now.
rm -rf latest.zip
3. Change the ownership of the nextcloud content directory to the HTTP user.
chown -R www-data:www-data /var/www/nextcloud/Step4. Install NextCloud From the Command Line
We are going to install Nextcloud on Ubuntu 22.04 from the command line, it will save us time as we are providing all the database and admin credentials for installation. It will install Nextcloud silently, we don’t have to go through web setup. For detailed Nextcloud Command line installation, visit this page.
1. Run the CLI Command
cd /var/www/nextcloud
sudo -u www-data php occ  maintenance:install --database \
"mysql" --database-name "nextcloud"  --database-user "nextcloud" --database-pass \
"passw@rd" --admin-user "admin" --admin-pass "admin123"
If everything goes well the command will output “Nextcloud was successfully installed”. We provided a very simple user/password, during production setup, this must be a complex password.
2. nextcloud allows access only from localhost, it could through error “Access through untrusted domain”. we need to allow accessing nextcloud by using ip or domain name.
vi /var/www/nextcloud/config/config.php

  'trusted_domains' =>
  array (
    0 => 'localhost',
    1 => 'nc.mailserverguru.com',   // we Included the Sub Domain
  ),

  .....
:x    // saving the file
3. Configure Apache to load Nextcloud from the /var/www/nextcloud folder.
vi /etc/apache2/sites-enabled/000-default.conf

<VirtualHost *:80>
        ServerAdmin webmaster@localhost
        DocumentRoot /var/www/nextcloud
        ErrorLog ${APACHE_LOG_DIR}/error.log
        CustomLog ${APACHE_LOG_DIR}/access.log combined
</VirtualHost>

// Now, Restart Apache Server

systemctl restart apache2
Now, Go to the Browser and type http:// [ ip or fqdn ] of the server, The below Nextcloud login page will appear.
The Basic NextCloud Installation on Ubuntu 22.04 is completed, Now we are going to Work on the Performance and Security.
Step5. Install and Configure PHP-FPM with Apache
Here we will install PHP-FPM, which is faster than the mpm-prefork module, which is the default method of executing php files on Apache.
1. Install php-fpm
apt install php8.1-fpm
service php8.1-fpm status    // Check the php-fpm is running
2. Check the php-fpm version and Socket.
php-fpm8.1 -v
ls -la /var/run/php/php8.1-fpm.sock
3. Disable Apache prefork module
a2dismod php8.1
a2dismod mpm_prefork
4. Enable php-fpm
a2enmod mpm_event proxy_fcgi setenvif
a2enconf php8.1-fpm
5. set required php.ini variables
vi /etc/php/8.1/fpm/php.ini

upload_max_filesize = 64M
post_max_size = 96M
memory_limit = 512M
max_execution_time = 600
max_input_vars = 3000
max_input_time = 1000

:x
6. php-fpm pool Configurations
vi /etc/php/8.1/fpm/pool.d/www.conf

pm.max_children = 64
pm.start_servers = 16
pm.min_spare_servers = 16
pm.max_spare_servers = 32

:x

service php8.1-fpm restart
7. Apache directives for php files processing by php-fpm
vi /etc/apache2/sites-enabled/000-default.conf

<VirtualHost *:80>

	ServerAdmin webmaster@localhost
	DocumentRoot /var/www/nextcloud


	<Directory /var/www/nextcloud>
          Options Indexes FollowSymLinks
          AllowOverride All
          Require all granted
	</Directory>

	<FilesMatch ".php$">
         SetHandler "proxy:unix:/var/run/php/php8.1-fpm.sock|fcgi://localhost/"
	</FilesMatch>


	ErrorLog ${APACHE_LOG_DIR}/error.log
	CustomLog ${APACHE_LOG_DIR}/access.log combined

</VirtualHost>

:x

service apache2 restart
Step6. Create info.php Page for php feature check
Create an info.php page, it will show us whether php-fpm, opcache, apcu are enabled with the php.
cd /var/www/nextcloud

vi info.php
    <?php phpinfo(); ?>
:x
Now Browse http://nc.mailserverguru.com/info.php, it will show “Server API FPM/FastCGI” if the php-fpm is enabled on the PHP.

Step7. Enable Opcache in php
Opcache is a caching engine for PHP. It stores precompiled script bytecode in shared memory, so parsing PHP scripts on each request won’t be necessary. It increases php file execution and website loading performance.
vi /etc/php/8.1/fpm/php.ini

opcache.enable=1
opcache.enable_cli=1
opcache.interned_strings_buffer=8
opcache.max_accelerated_files=10000
opcache.memory_consumption=128
opcache.save_comments=1
opcache.revalidate_freq=60

:x

// Now, Restart apache and php-fpm

systemctl restart php8.1-fpm
systemctl restart apache2
Now, Check http://nc.mailserverguru.com/info.php again, it will show the “Opcache is Up and Running”

Step8. Enable APCu in php
APCu is the user data caching. It is a local cache for systems. Nextcloud uses this for memory caching.
1. Install APCu
apt install php8.1-apcu
2. Configure Nextcloud to use APCu for memory caching.
vi /var/www/nextcloud/config/config.php

'memcache.local' => '\OC\Memcache\APCu',

:x

// Restart php-fpm and apache

systemctl restart php8.1-fpm
systemctl restart apache2
Now, Check the http://nc.mailserverguru.com/info.php again, it will show the “APCu support Enabled”

Step9. Install and Configure Redis
In Nextcloud, Redis is used for local and distributed caching as well as transactional file locking. we used APCu for Local Cahing which is faster than Redis. We will use Redis for File locking. Nextcloud’s Transactional File Locking mechanism locks files to avoid file corruption during normal operation.
1. Install Redis Server and Redis php extension
apt-get install redis-server php-redis

systemctl start redis-server
systemctl enable redis-server
2. Configure Redis to use Unix Socket than ports
vi /etc/redis/redis.conf

port 0
unixsocket /var/run/redis/redis.sock
unixsocketperm 770

:x
3. Add Apache user to the Redis group
usermod -a -G redis www-data
4. Configure Nextcloud for using Redis for File Locking
vi /var/www/nextcloud/config/config.php

'filelocking.enabled' => 'true',
'memcache.locking' => '\OC\Memcache\Redis',
'redis' => [
     'host'     => '/var/run/redis/redis.sock',
     'port'     => 0,
     'dbindex'  => 0,
     'password' => '',
     'timeout'  => 1.5,
],

:x
5. Enable Redis session locking in PHP
vi /etc/php/8.1/fpm/php.ini

redis.session.locking_enabled=1
redis.session.lock_retries=-1
redis.session.lock_wait_time=10000

:x

// Now, Restart php-fpm and apache

systemctl restart php8.1-fpm
systemctl restart apache2
Now, we can check Redis use, (by enabling the Redis port in the Redis configuration) by running the command “redis-cli MONITOR“, during Nextcloud loading it will show live data on the screen.
Now, that we have finished Performance improvement steps. We are going to work for the Security, First of all, we will install an SSL certificate for Nextcloud.
Step10. Install SSL and Enable HTTP2
1. We will install the LetsEncrypt certificate, so, first, we need the Certbot tools.
apt-get install python3-certbot-apache -y
2. with the Certbot tool, let’s request a Certificate for our domain.
certbot --apache -d nc.mailserverguru.com

Saving debug log to /var/log/letsencrypt/letsencrypt.log
Enter email address (used for urgent renewal and security notices)
 (Enter 'c' to cancel): [email protected]   // Input Email Address

- - - - - - - - - - - - - - - - - - - - - - - - - - - - - - - - - - - - - - - -
Please read the Terms of Service at
https://letsencrypt.org/documents/LE-SA-v1.2-November-15-2017.pdf. You must
agree in order to register with the ACME server. Do you agree?
- - - - - - - - - - - - - - - - - - - - - - - - - - - - - - - - - - - - - - - -
(Y)es/(N)o: Y   // Press Y here

- - - - - - - - - - - - - - - - - - - - - - - - - - - - - - - - - - - - - - - -
Would you be willing, once your first certificate is successfully issued, to
share your email address with the Electronic Frontier Foundation, a founding
partner of the Let's Encrypt project and the non-profit organization that
develops Certbot? We'd like to send you email about our work encrypting the web,
EFF news, campaigns, and ways to support digital freedom.
- - - - - - - - - - - - - - - - - - - - - - - - - - - - - - - - - - - - - - - -
(Y)es/(N)o: Y   // Press Y here

Account registered.
Requesting a certificate for nc.mailserverguru.com

Successfully received certificate.
Certificate is saved at: /etc/letsencrypt/live/nc.mailserverguru.com/fullchain.pem
Key is saved at:         /etc/letsencrypt/live/nc.mailserverguru.com/privkey.pem
This certificate expires on 2022-10-13.
These files will be updated when the certificate renews.
Certbot has set up a scheduled task to automatically renew this certificate in the background.

Deploying certificate
Successfully deployed certificate for nc.mailserverguru.com to /etc/apache2/sites-available/000-default-le-ssl.conf
Congratulations! You have successfully enabled HTTPS on https://nc.mailserverguru.com
We were unable to subscribe you the EFF mailing list because your e-mail address appears to be invalid. You can try again later by visiting https://act.eff.org.

- - - - - - - - - - - - - - - - - - - - - - - - - - - - - - - - - - - - - - - -
If you like Certbot, please consider supporting our work by:
 * Donating to ISRG / Let's Encrypt:   https://letsencrypt.org/donate
 * Donating to EFF:                    https://eff.org/donate-le
- - - - - - - - - - - - - - - - - - - - - - - - - - - - - - - - - - - - - - - -
3. Enable apache HTTP2 module and configure site for the http2 protocols
a2enmod http2

vi /etc/apache2/sites-enabled/000-default-le-ssl.conf

<VirtualHost *:443>

        Protocols h2 h2c http/1.1

        ServerAdmin webmaster@localhost
        DocumentRoot /var/www/nextcloud
  ......

:x

// Now, Restart Apache

systemctl restart apache2
4. Test the http2 protocol, by sending an http2 request to the web server.
curl -I --http2 -s https://nc.mailserverguru.com/ | grep HTTP

HTTP/2 200
Or, we can Inspect the Browser while accessing Nextcloud URL, we can easily see the protocol column from the Network tab, and it will show h2 as the protocol which is http2.

5. HTTP Strict Transport Security, which instructs browsers not to allow any connection to the Nextcloud instance using HTTP, prevents man-in-the-middle attacks.
<VirtualHost *:443>
  ServerName nc.mailserverguru.com

<IfModule mod_headers.c>
    Header always set Strict-Transport-Security "max-age=15552000; includeSubDomains"
</IfModule>

</VirtualHost>
Step11. Pretty URL’s
Pretty URLs remove the "index.php” part in all Nextcloud URLs. It will make URLs shorter and prettier.
vi /var/www/nextcloud/config/config.php

'htaccess.RewriteBase' => '/',

:x

// This command will update the .htaccess file for the redirection

sudo -u www-data php --define apc.enable_cli=1 /var/www/nextcloud/occ maintenance:update:htaccess
So, this is it..
We have done our Complete Install NextCloud On Ubuntu 22.04 LTS.
Thanks !!
Nextcloud can be installed in multiple ways. Here, we will discuss how to Install Nextcloud on Web Panels via Web Installer.
For hosting websites and web-based applications we need a web server. Famous web panels like cPanel, ISPConfig, Cyberpanel, etc are web servers with user-friendly interfaces. We can install NextCloud on any web panel.
With the installation of web panels, all required services and modules are installed, so during the installation of Nextcloud, it should not be necessary to install any PHP modules. Moreover, we can quickly create databases for Nextcloud via the web interface.
So, how do we proceed? We will download a php install script from nextcloud. We will save and run it from the web panels hosting space. The script will check the dependencies, download Nextcloud from the official server, and unpack it, with the right permissions and the right user account.
Finally, it will be redirected to the Nextcloud installer page. rest of the setup needs to be done manually from the web interface.
In this guide, I will demonstrate how to install Nextcloud on the hestiaCP web hosting panel.
The steps we are going to follow:
1. Create Hosting Space on the HestiCP hosting Panel
2. Creating MySQL DB on the Panel
3. Download the Web installer Script from Nextcloud
4. Upload the script to the hosting space
5. Run the Setup Script from the Browser.
To Install Nextcloud on Web Panels via Web Installer, we need to create a hosting space for nextcloud, the space needs to be created with a web panel user, web space and database will be created with the user permission.
1. Create Hosting Space on the HestiCP hosting Panel
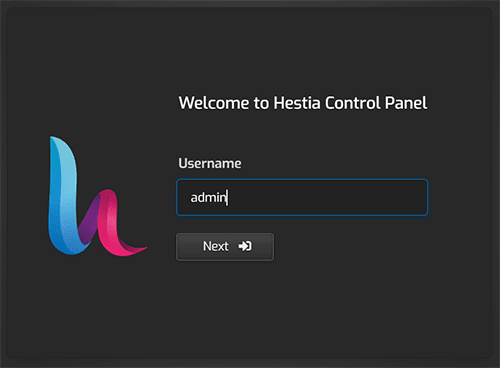
1. Login to HestiaCP Web Interface
2. Create an User for the Nextcloud Hosting Space, this will be a Web Panel Only User.
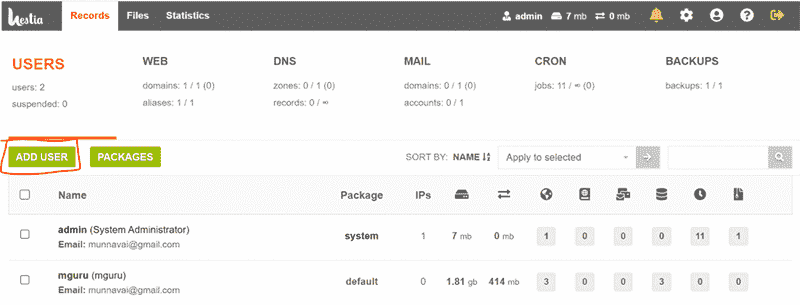
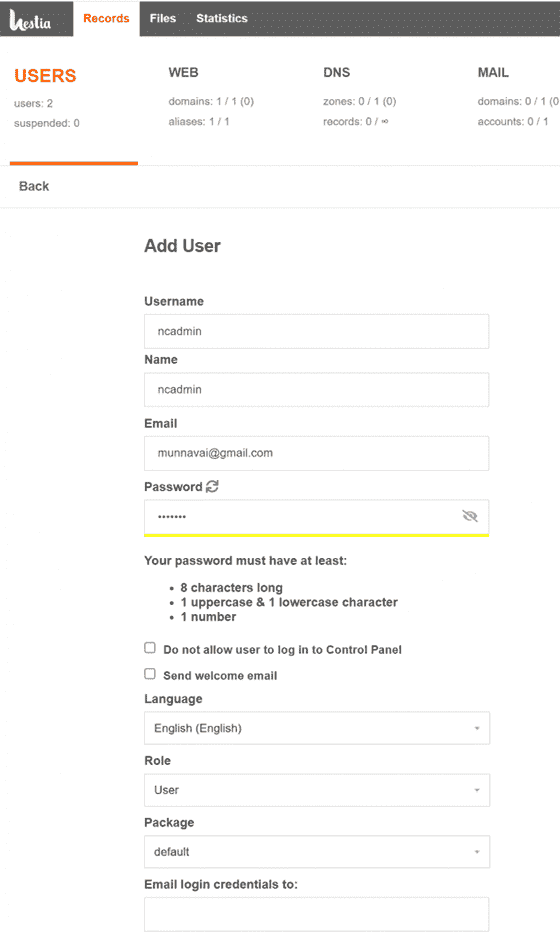
3. Provide User Name, Password, Email, etc. for the Web Panel User.
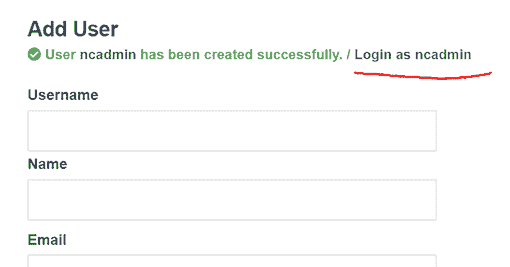
4. After the user is Created, log in with that user.
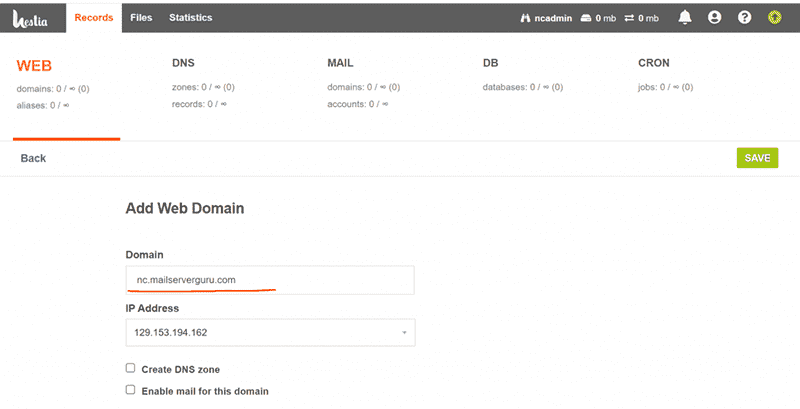
5. After logging in to the Panel, create the domain.
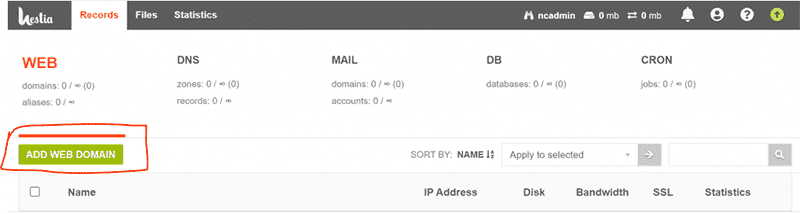
6. Provide the Domain Detail and Click the Save button.
2. Creating MySQL DB on the Panel
1. On the Web Panel, Go to DB Section. and Click add Database

2. Provide Database Details

3. Download the Web installer Script Nextcloud
– Download the script from Nextcloud Download Page.

4. Upload the script to the hosting space
1. To Upload files, we need to Click the Files tab.

2. The Files window will show the directory tree of the hosting space.
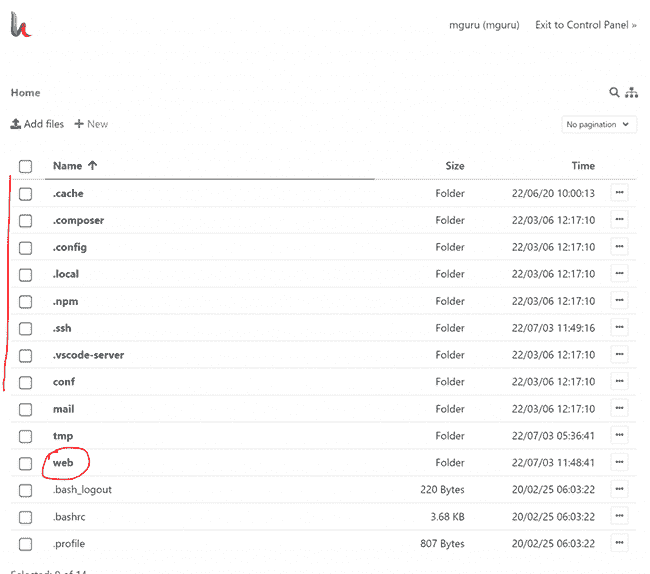
3. We need to travel to the root directory of the hosting space, then Click on “Add files”

4. Now, Upload the file.
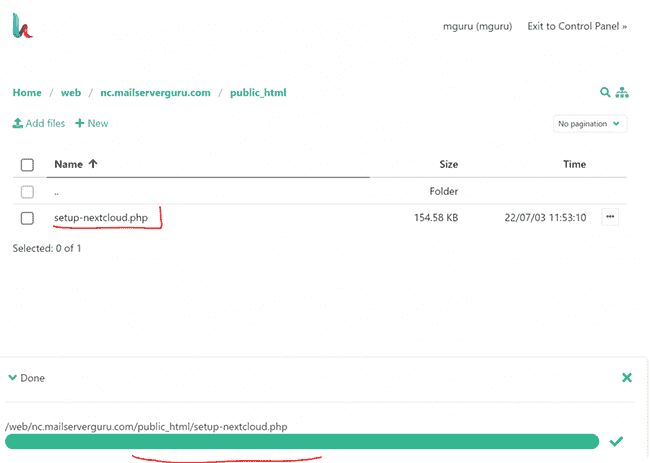
Our upload is complete, we need to fire the script from the browser.
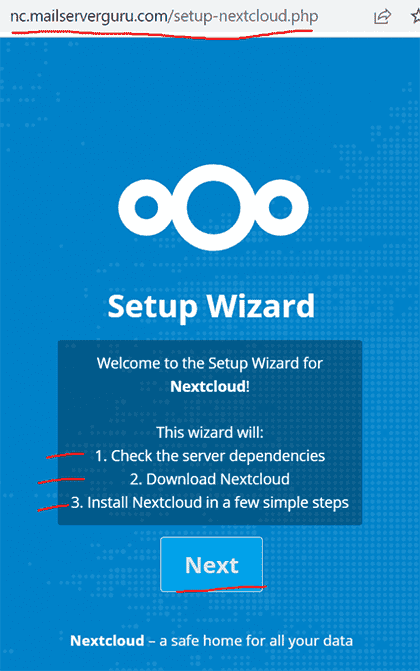
5. Run the Setup Script from the Browser.
1. Run the script from the browser: http://[ip or domain]/setup-nextcloud.php
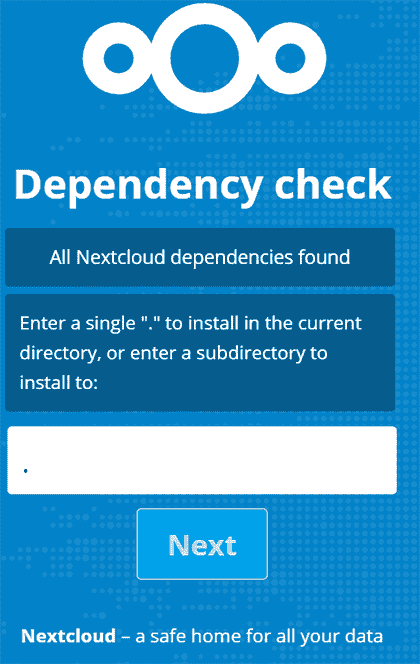
2. Dependency check completed, now enter only “.” into the textbox to install Nextcloud on the current root directory. then click Next.
3. If all is OK, the Nextcloud installation will succeed.
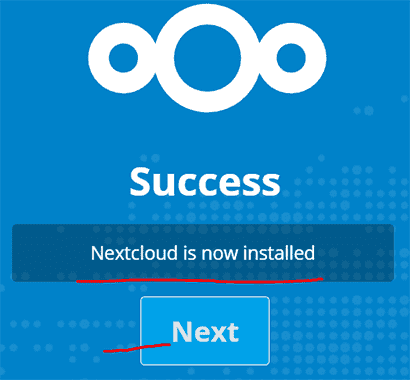
4. Now, if we Click Next, it will show the Nextcloud Configuration Page. We need to provide the nextcloud admin user/pass, and database details to complete the setup process.
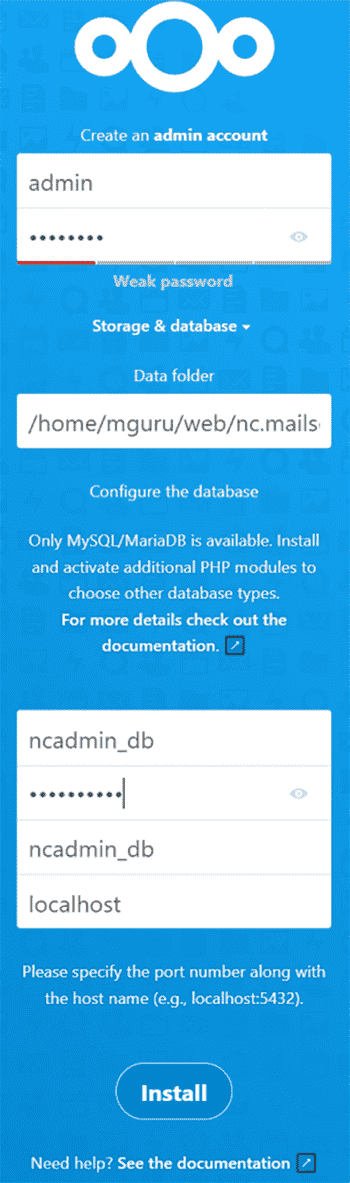
5. After providing all the details above, if we click next, the nextcloud login page will appear, that means, our installation is done and the system is ready for use.
Thanks !!
